Labels let you save time by batching similar tasks together. In Todoist, you can add as many labels as needed, and then pull up a list of tasks with any of these labels in seconds.
Create a label
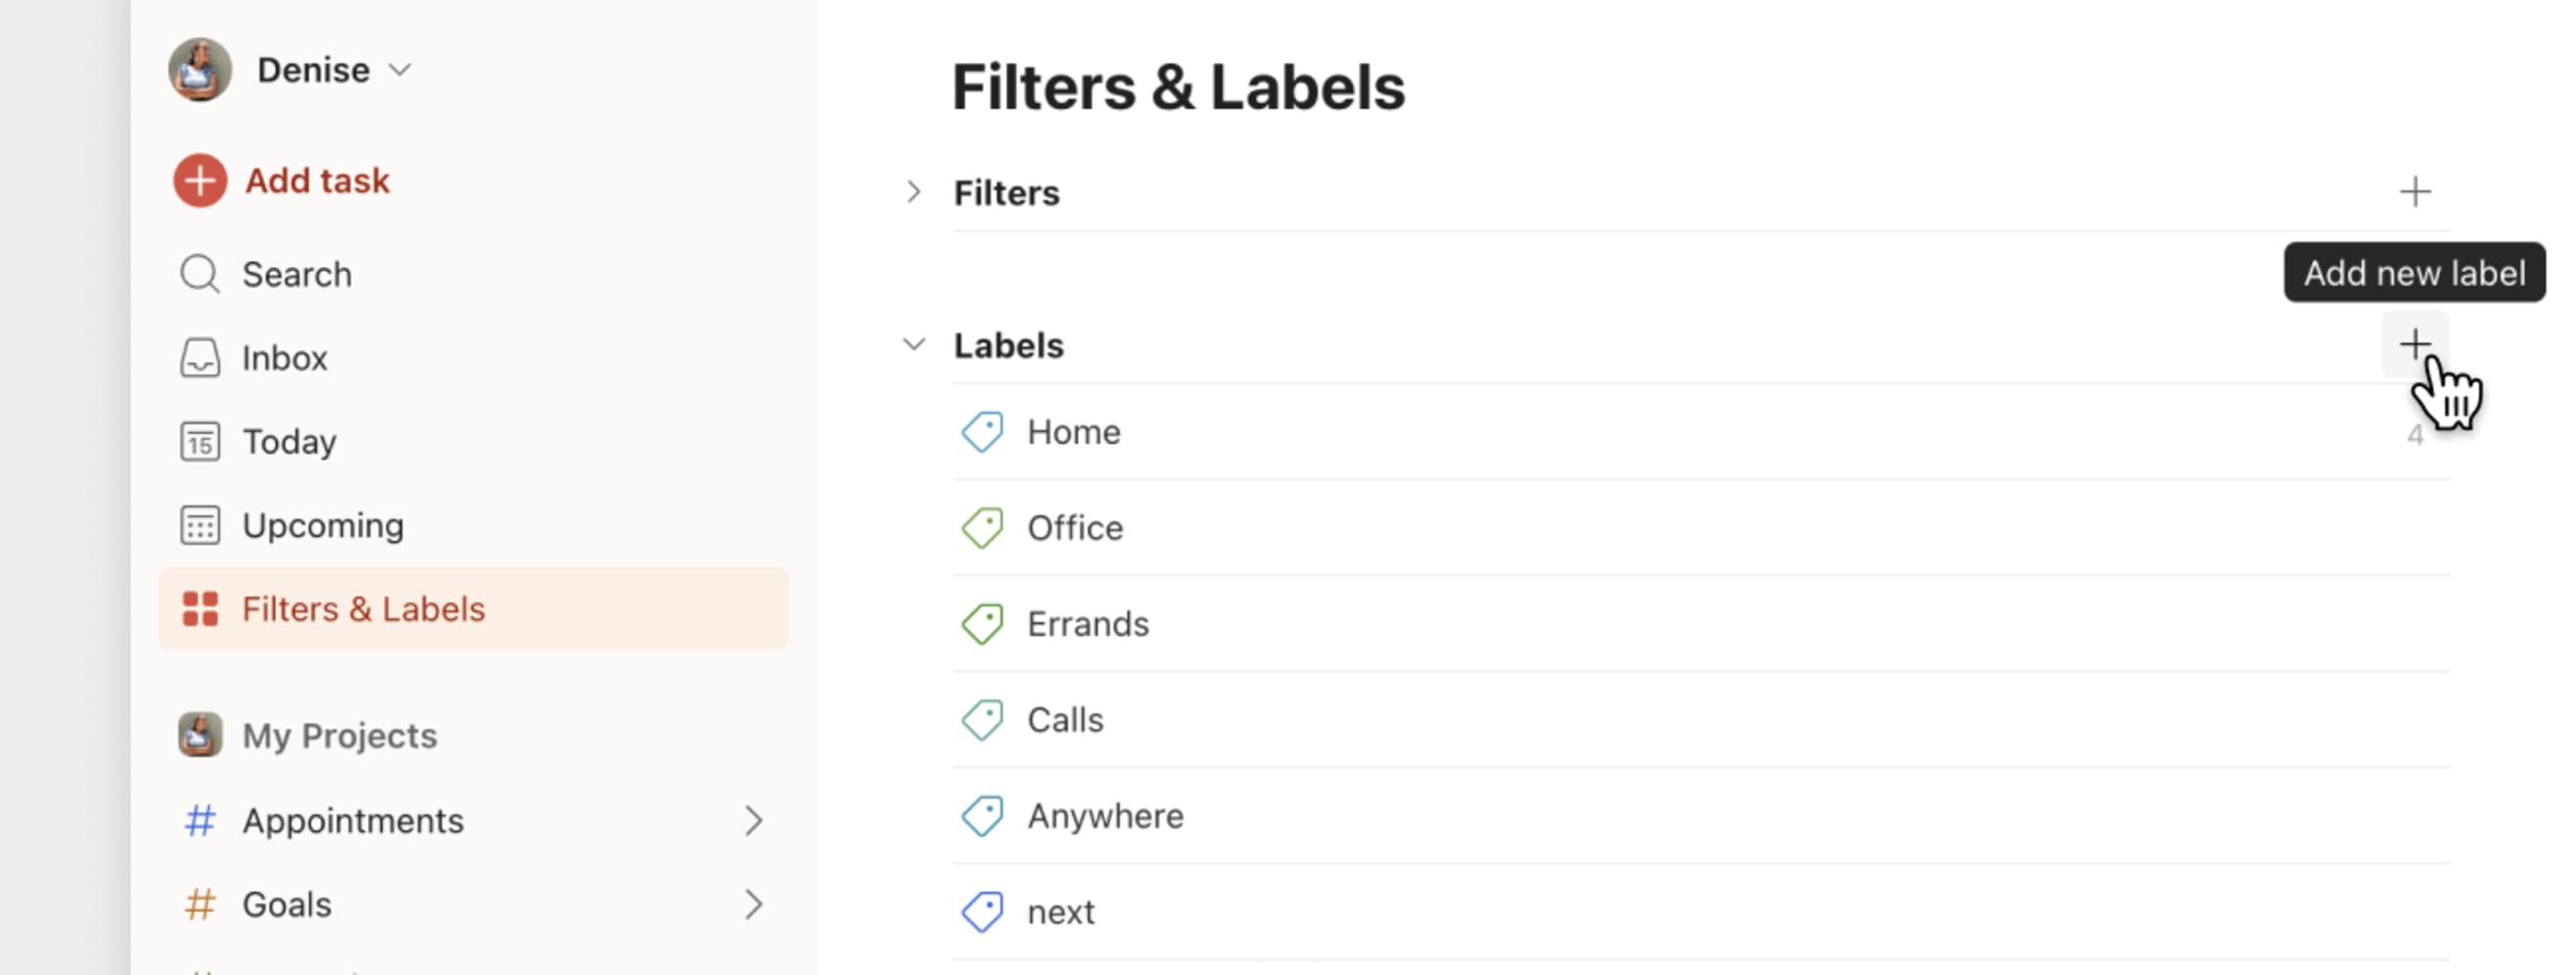
- Click Filters & Labels in the sidebar. If you don't see this view, customize your sidebar to display it.
- Click the plus icon next to Labels.
- Type a label name and choose a color. If you use this label often, add it as a favorite.
- Click Add to confirm.
Add a label to a new task
- Click Add task to create a new task.
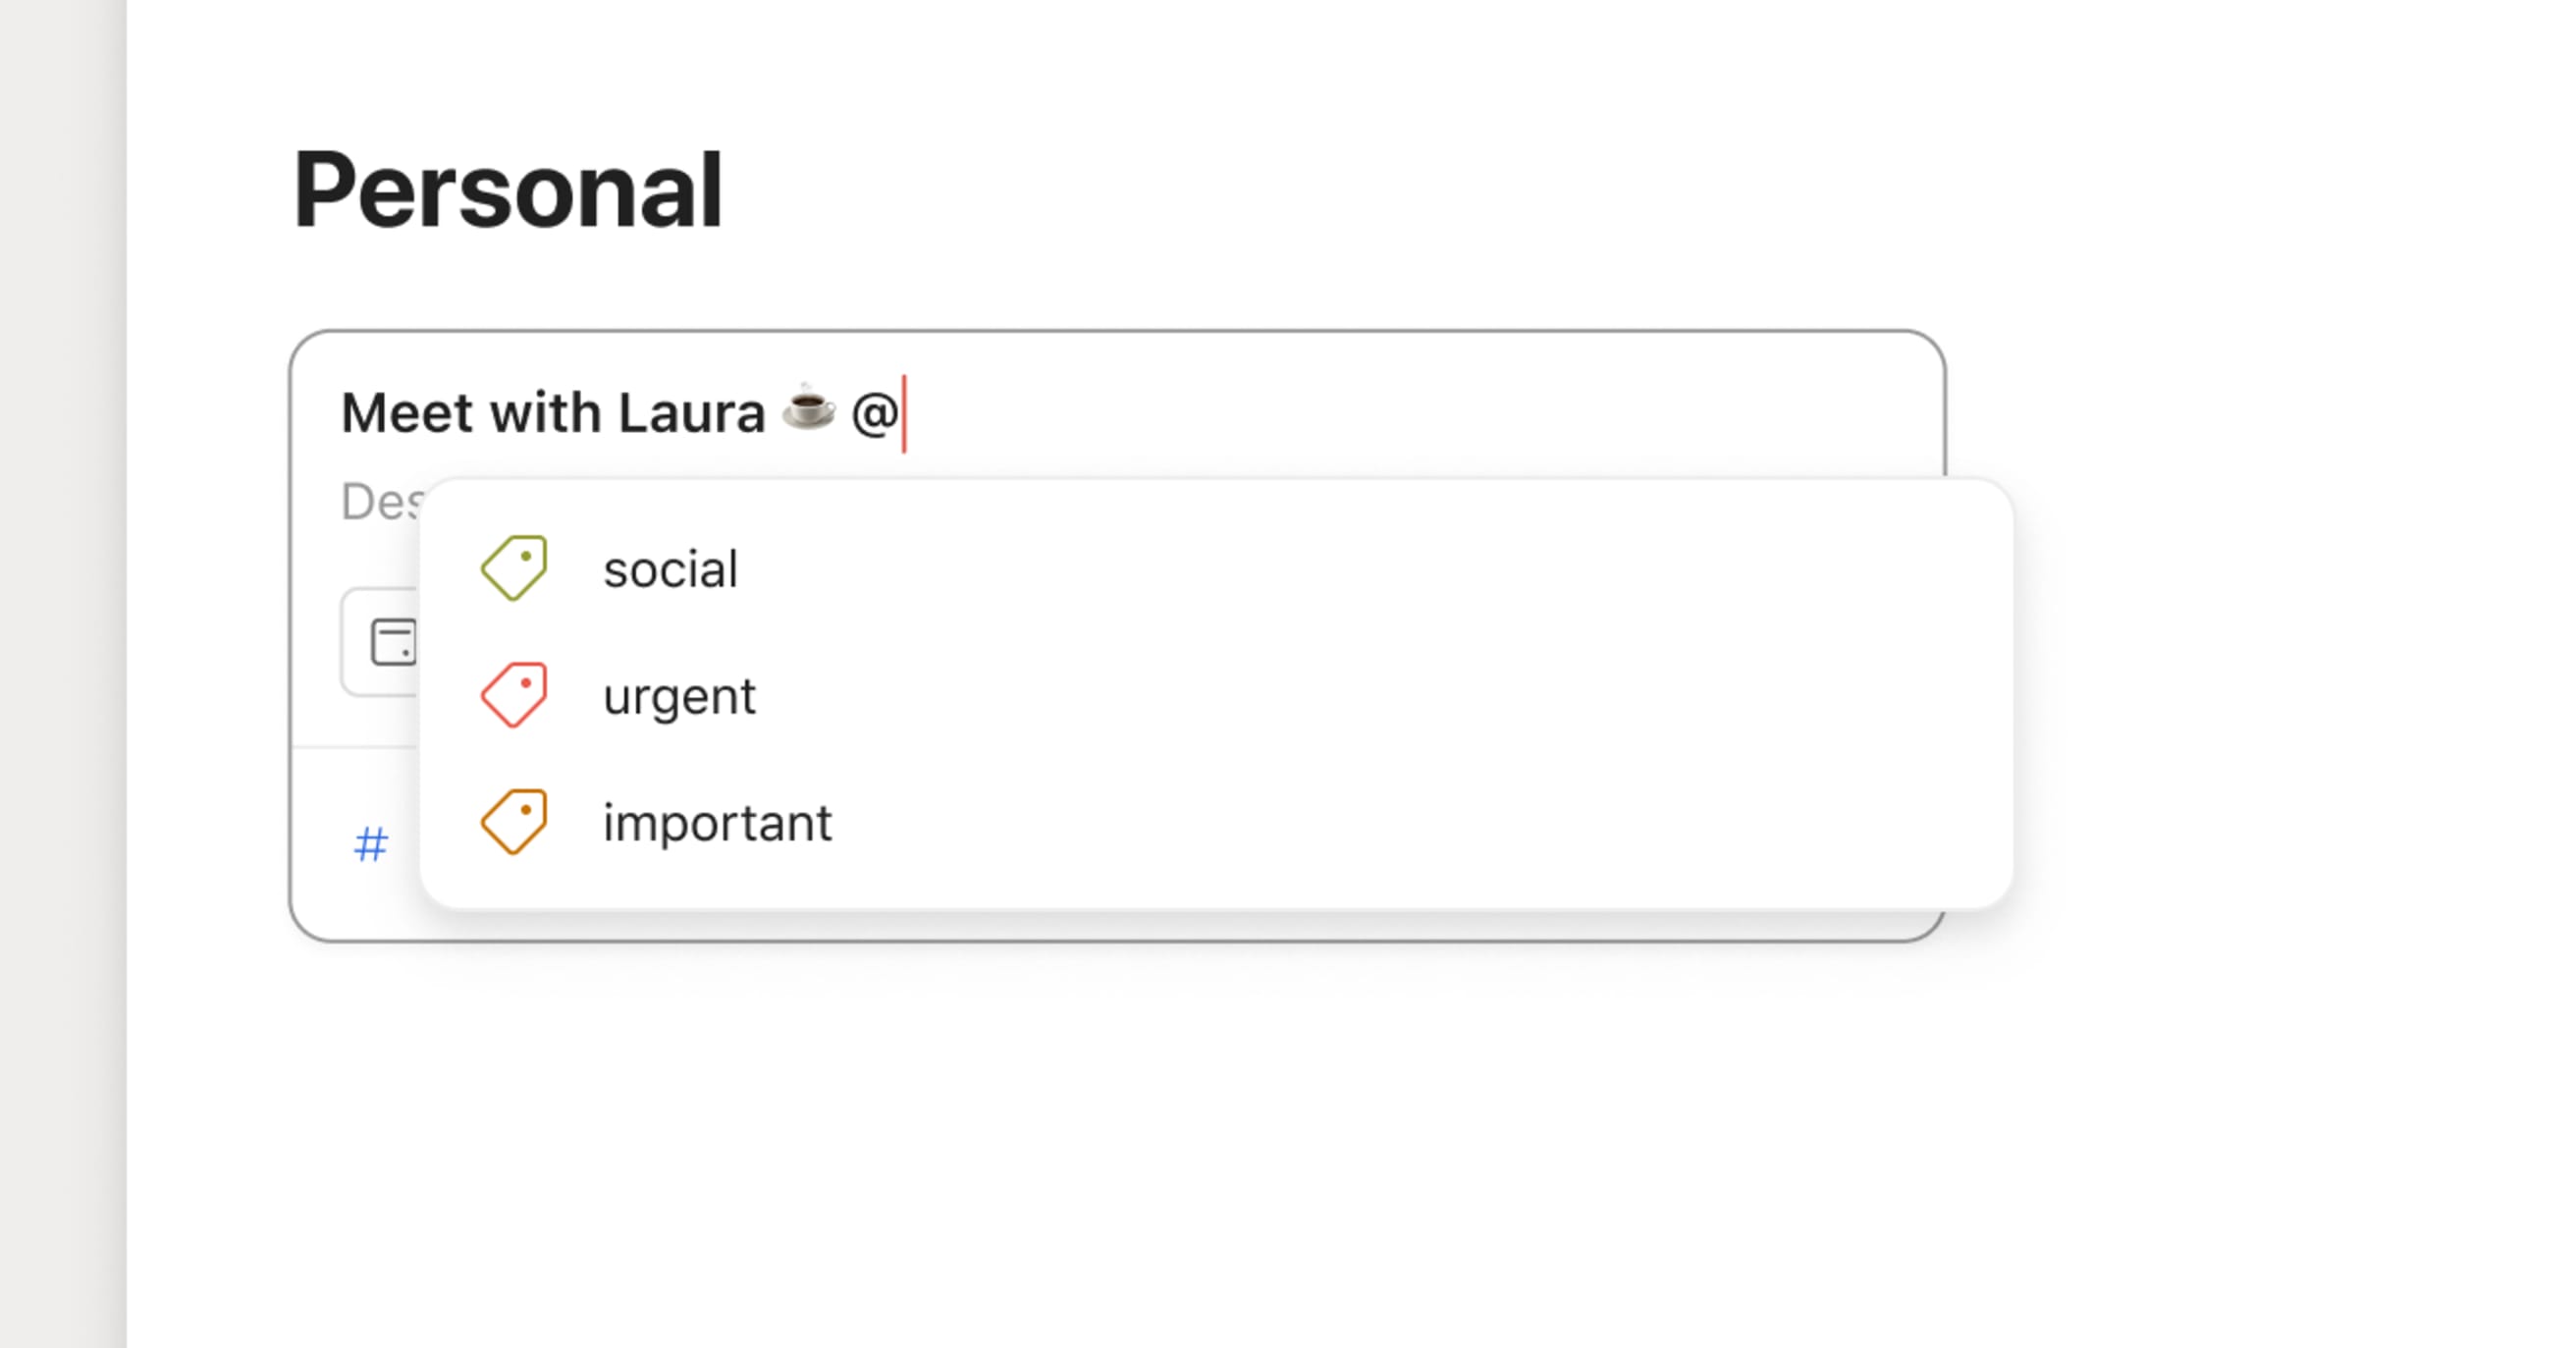
- Click the Labels chip or type
@into the task field. If the Labels chip isn't visible, customize Quick Add to add it as a task action. - Select the label(s) you want to add from the menu. If the label doesn't exist, finish typing the label name and click Create to create it.
- Click Add task to confirm.
Add a label to an existing task
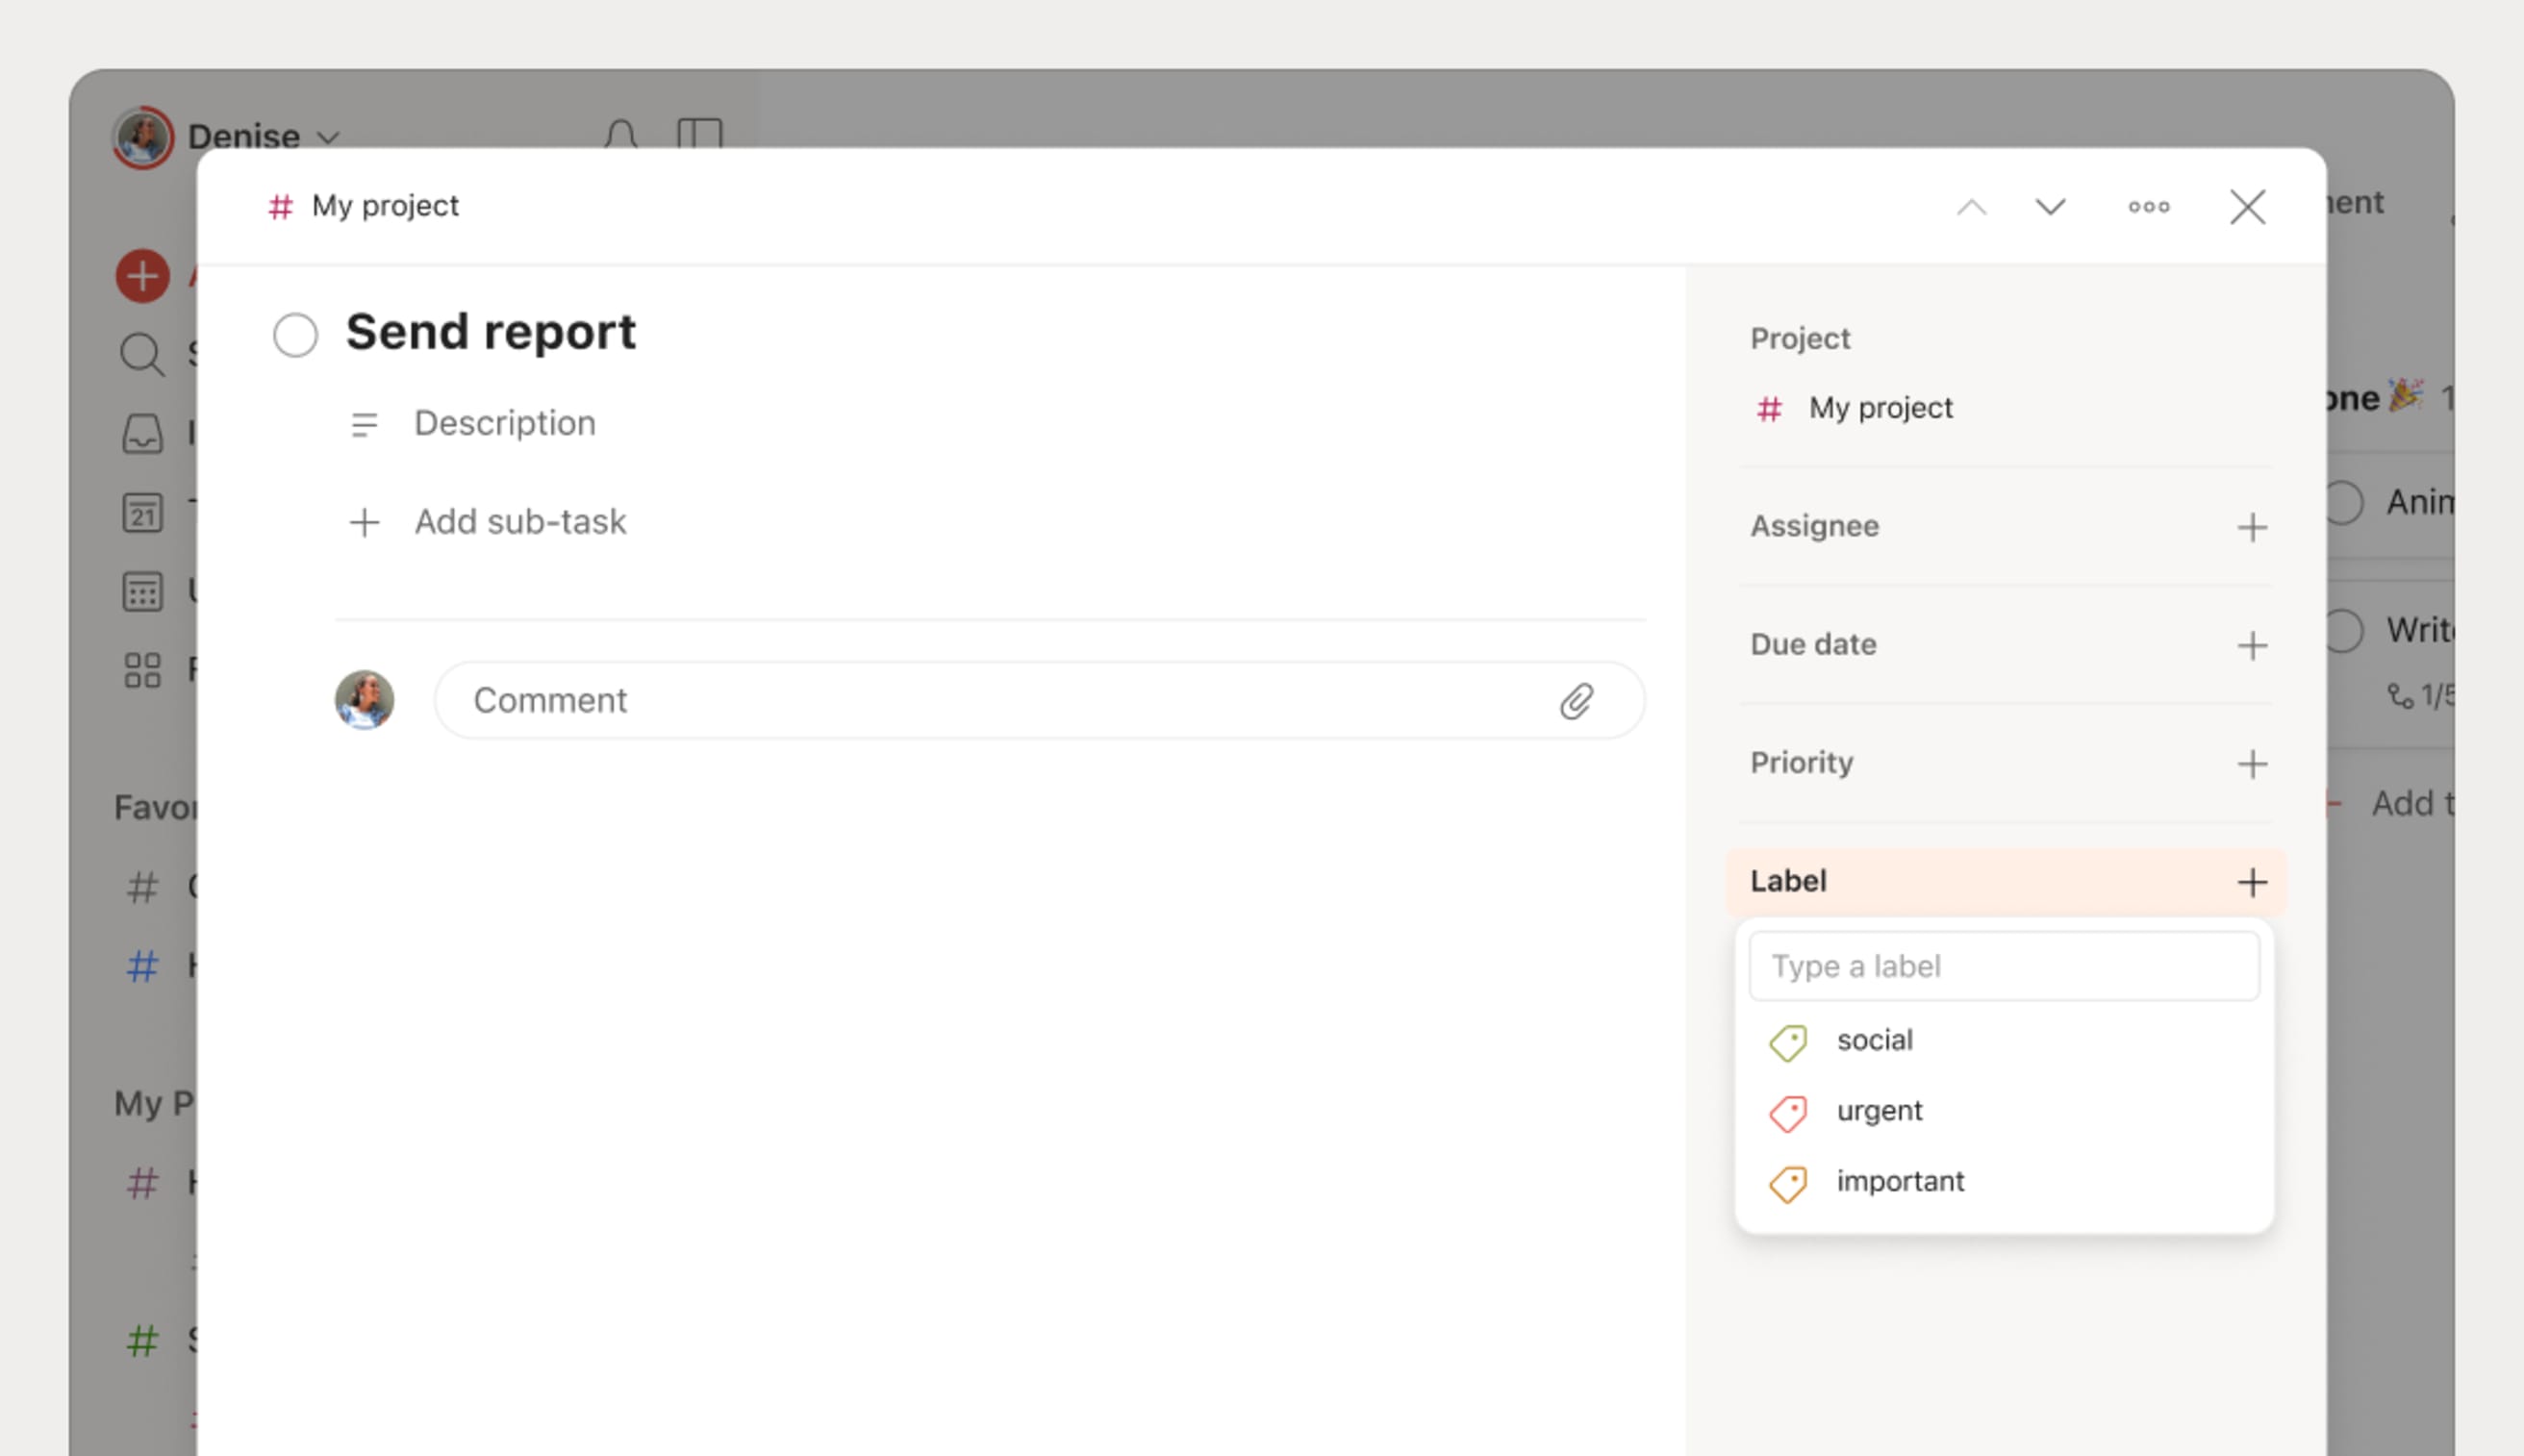
- Click a task to open the task view.
- Click Labels on the right side of the task view.
- Select the label or type the label name in the Type a label field. If the label doesn't exist, enter the full label name and click Create to create it.
You’ll find your newly created label in the Labels list.
Quick tip
You can add special characters, like @ , " ( ) | & or !, when naming your labels.
Edit a label
As your workflow changes, so can your labels. Here’s how to change the label name or color:
- Click Filters & Labels in the sidebar.
- In the Labels section, click the label.
- Click the three dots icon to the right of the label.
- Select Edit label.
- Enter a new label name or click the Label color menu to choose a different color.
- Click Save to confirm.
Handy labels to try out
Not sure how to get started? Here are a few examples to inspire you:
| Category | Label |
|---|---|
| Time to complete tasks |
|
|
Time of day to start work |
|
| Type of work |
|
| Progress |
|
| Type of project |
|
| Work location |
|
Turn a shared label into a personal label
In Todoist, there are two types of labels you can create and add to tasks:
- Personal labels are those you’ve created. These labels come in a variety of colors, and they’ll stay on your list unless you remove them from your label list.
- Shared labels are those added by collaborators in shared projects, and are added to your shared list if there’s no exact match in your personal label list. Shared labels are displayed only in gray, and they’ll only stay in the shared labels list if there are any active tasks with this label.
Dermot · Customer Experience Specialist
Every member of the shared project can rename or delete a shared label. Their changes will apply to all the active tasks tagged with that label.
If you find yourself using a label often in your shared projects, here’s how to turn it into a personal label:
- Click Filters & Labels in the sidebar.
- Under Shared Labels, find the label you want to add.
- Click the three dots icon next to the label.
- Select Move to personal labels.
Delete a label
You may come across a label that no longer serves its purpose. No problem, you can simply delete it, so your labels list is neat and tidy:
- Click Filters & Labels in the sidebar.
- Find the label you want to delete.
- Click the three dots icon next to the label.
- Select Delete label. Click Delete again to confirm.
Note
If you deleted a personal or shared label, they’ll still appear on completed tasks. Whenever you uncomplete a task with a deleted label, a new label is created and added back to your labels lists. This label will have the name it had when the task was completed.
Get started
Start organizing your tasks with personal or shared labels in Todoist! If you run into any trouble adding or managing labels, get in touch with us. We— David, Rikke, Marco, and any one of our other teammates—are eager to help you get back on track.


