Todoist is already the command center for your work and life. Organize your team’s work too, and keep track of all your tasks in one infinitely customizable place.
Todoist is simple and intuitive enough to get your team up and running fast, and powerful enough to keep even the most ambitious projects on track.
What to expect when you add your team to Todoist
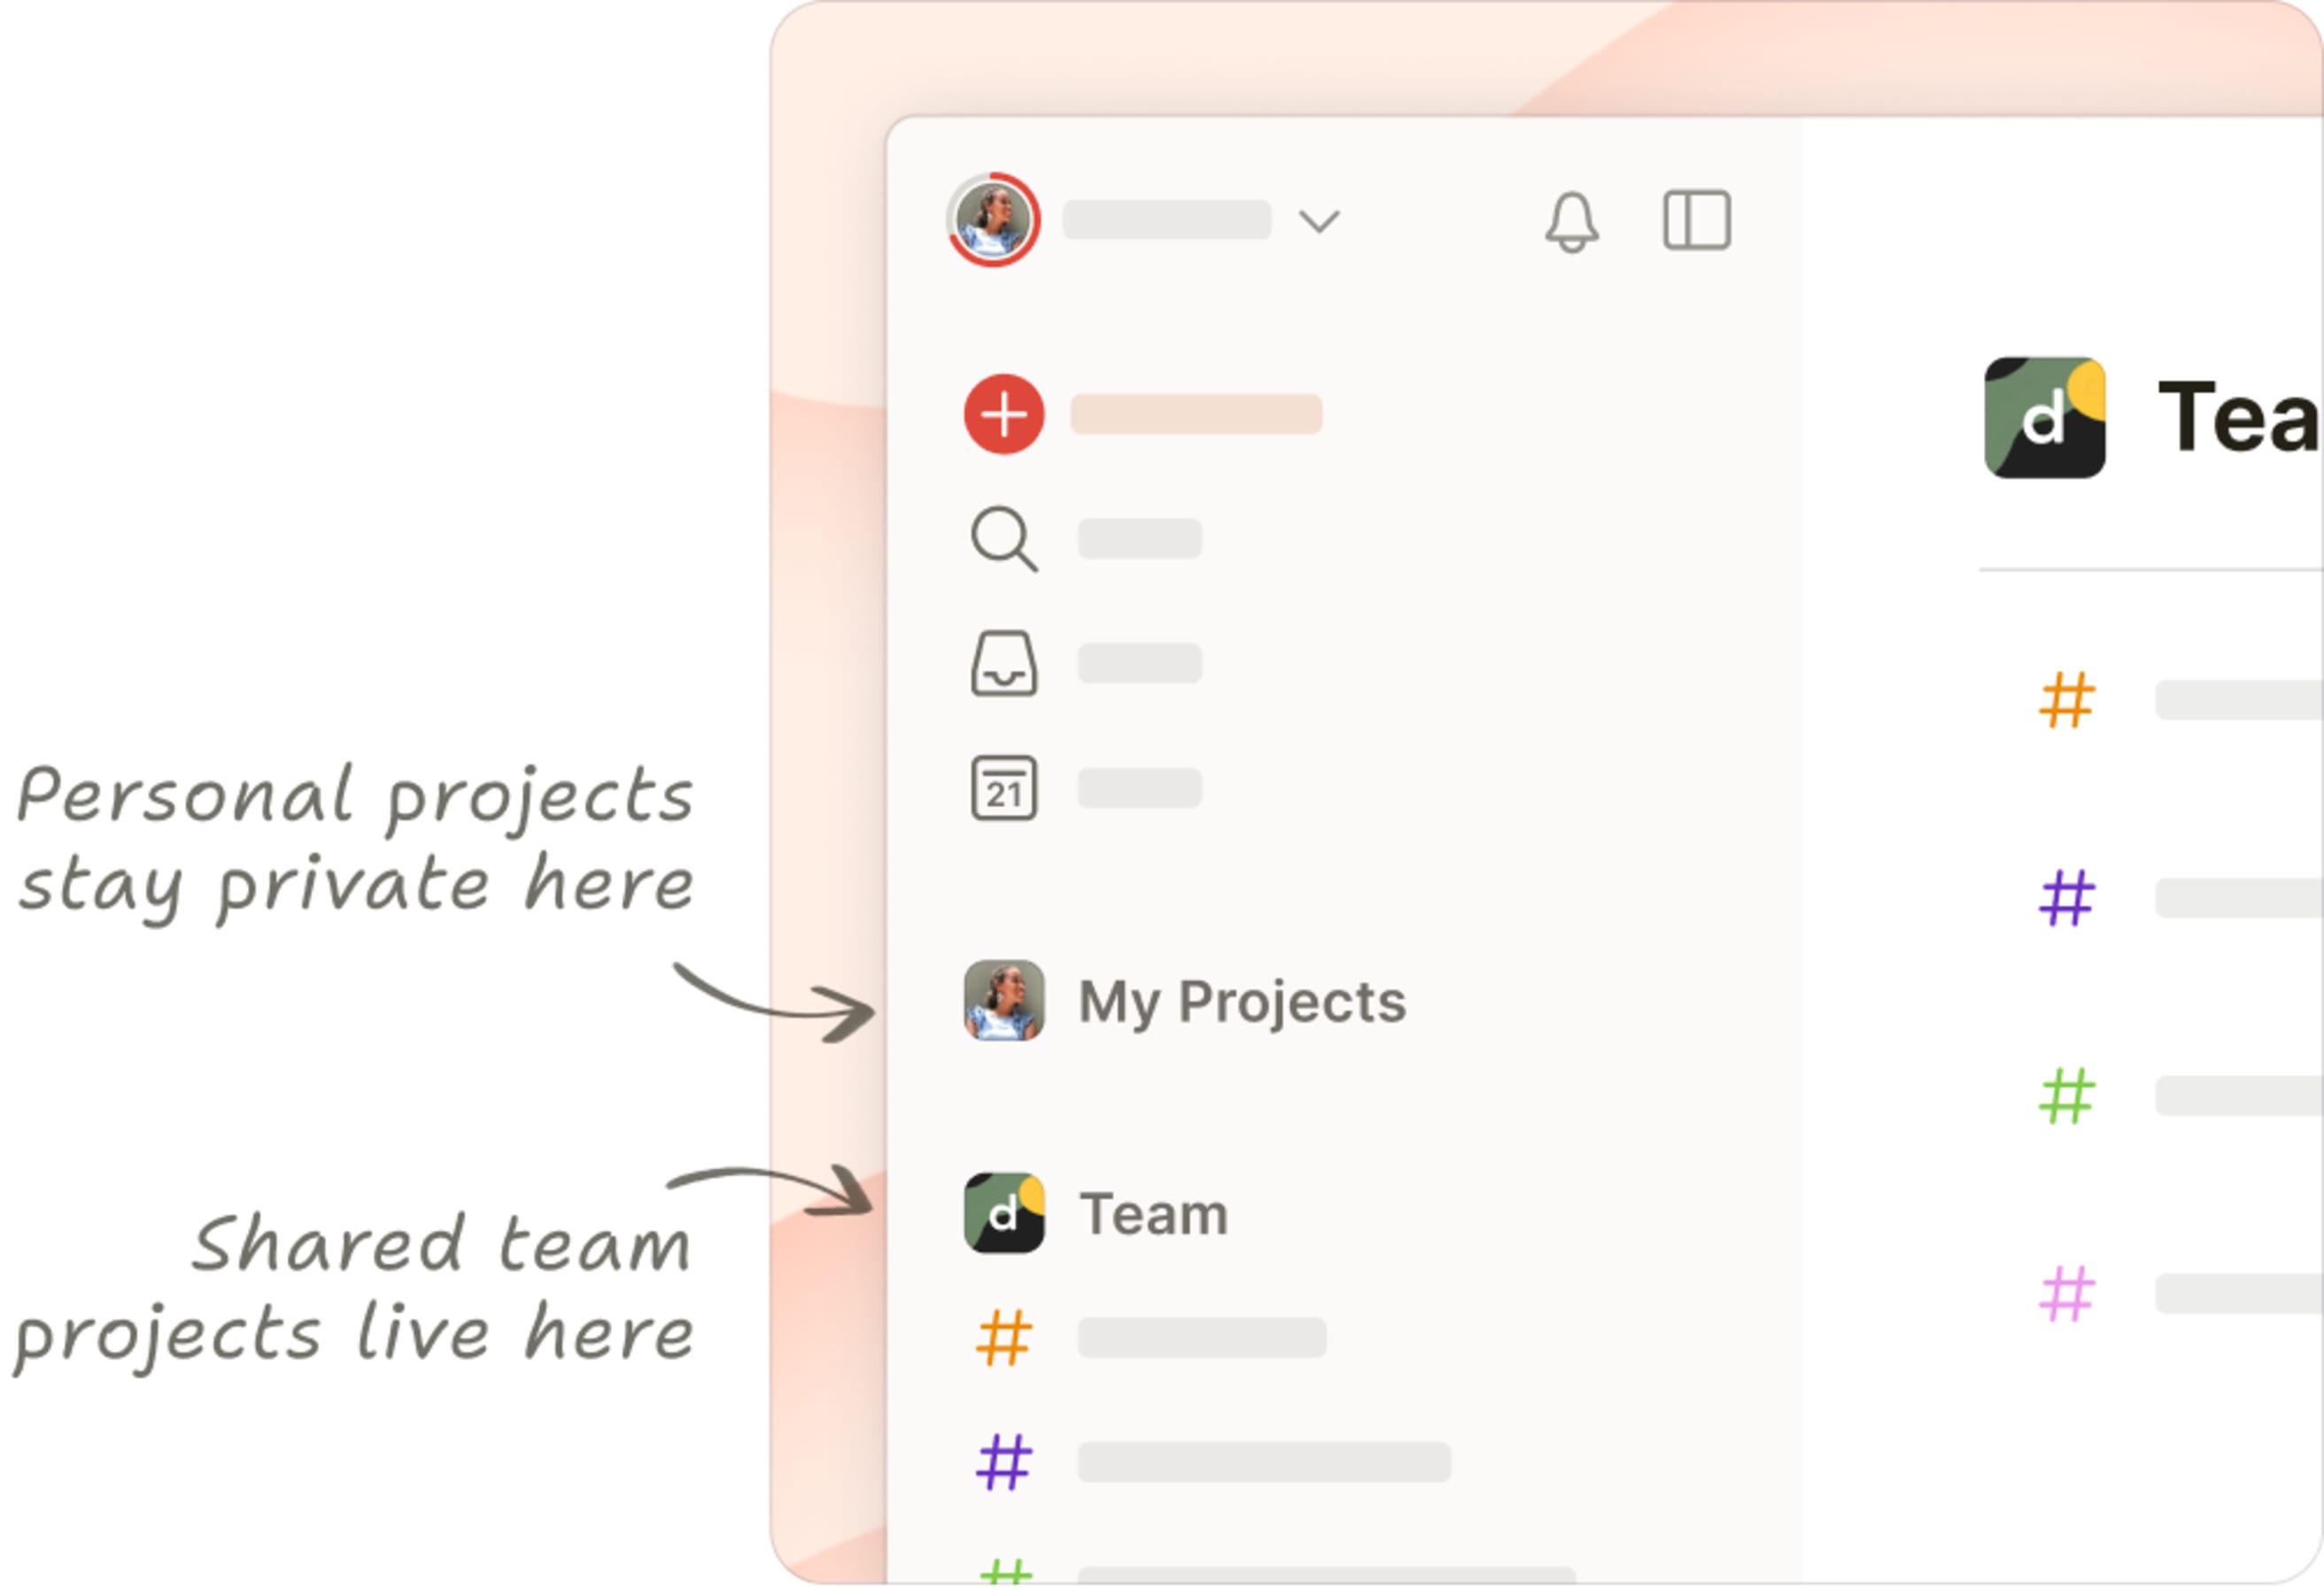
When you add a team to Todoist, you'll get a shared workspace for your team’s work – alongside but separate from everyone's personal tasks and projects.
- Team projects belong to the team and are accessible to everyone (unless they’re explicitly set to private).
- Personal projects (everything under “My Projects” in your sidebar) stay private and under your control – even if you leave your team.
All team members will be able to:
- Browse and preview public team projects and join just the ones that are relevant to them.
- Share direct links to projects, sections, tasks, and comments that teammates can preview and instantly take action on.
- Group or filter tasks by personal and/or team projects from the View Options menu in Today, Upcoming, and filter views to better separate work and life.
For team leaders, adding a team to Todoist:
- Gives you a transparent, organized overview of all your team’s work and lets you pop in to see progress without having to join each and every individual project.
- Makes data ownership crystal clear. Team projects belong to the team. Personal projects belong to the individual.
- Grants admins more control over permissions and data access in team settings.
Plus, if you upgrade your team to the Business plan, all members will automatically get access to all personal Pro features – like reminders, calendar layout for personal projects, and task durations!
(After all, when your teammates are organized and on top of their personal to-dos, teamwork magically tends to flow more smoothly, too. 💆)
Setting up a team from scratch
First things first, let's get your team set up in Todoist and ready to start getting things done from day one.
Step 1. Create a team
If you already have a Todoist account, get started by creating a new team for free. You’ll find the option in the bottom-left of your Todoist on the web or desktop apps.
If you’re new to Todoist, go ahead and create a new account. Toggle on the team option during the signup, and you’ll be guided through creating a team.
Note
Each team comes with 5 free projects, so you can get a feel for team collaboration in Todoist. Upgrade to the Business plan as your needs grow.
Step 2. Invite your teammates
Click Members in the top-right of your team. You’ll see two options to invite team members:
- Invite by email: Send an invitation to join your team.
- Invite by link: Copy and share an invite link with your team.
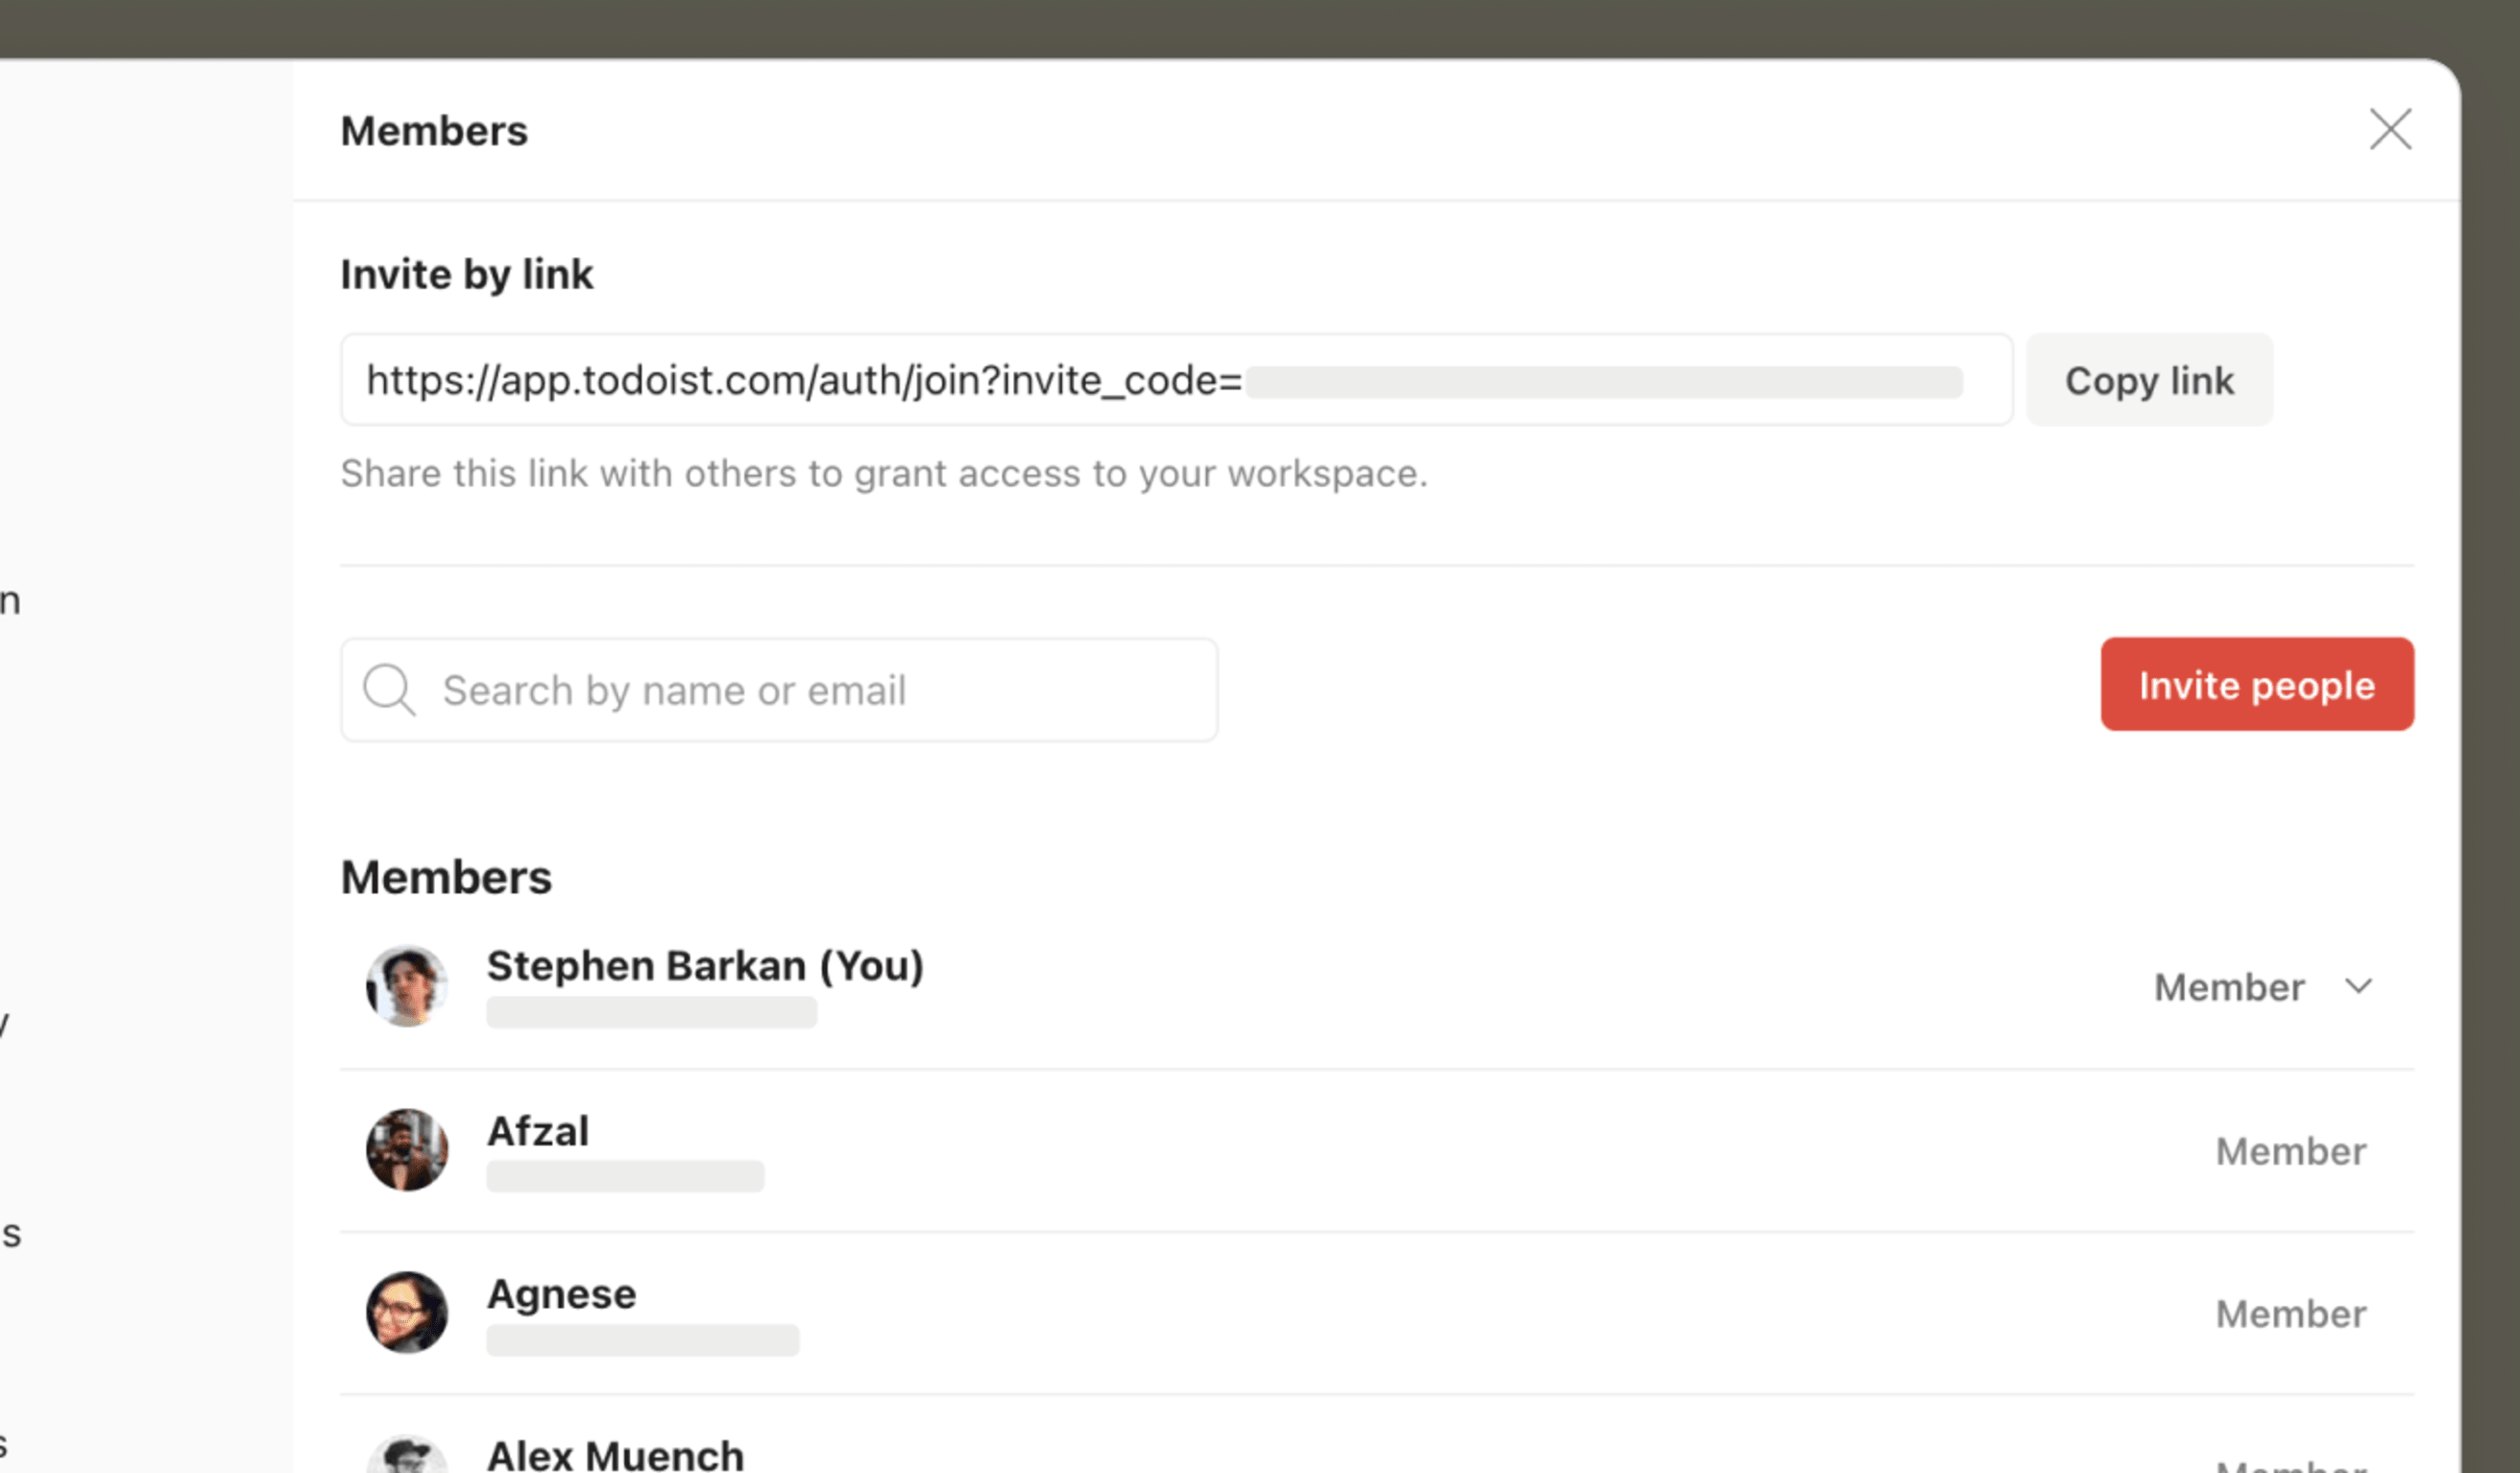
(You can also remove someone’s access and change their team role – admin, member, or guest – from here if needed.)
Step 3. Kickstart your teamwork with a few new projects
Create one or two new projects in your shared workspace for big things your team is working on and start listing any relevant tasks that come to mind. (Or get started with our pre-populated templates for teams.)
Quick tip
Organize your team projects into folders by department, client, initiative...whatever helps your team find the projects that are most relevant to them.
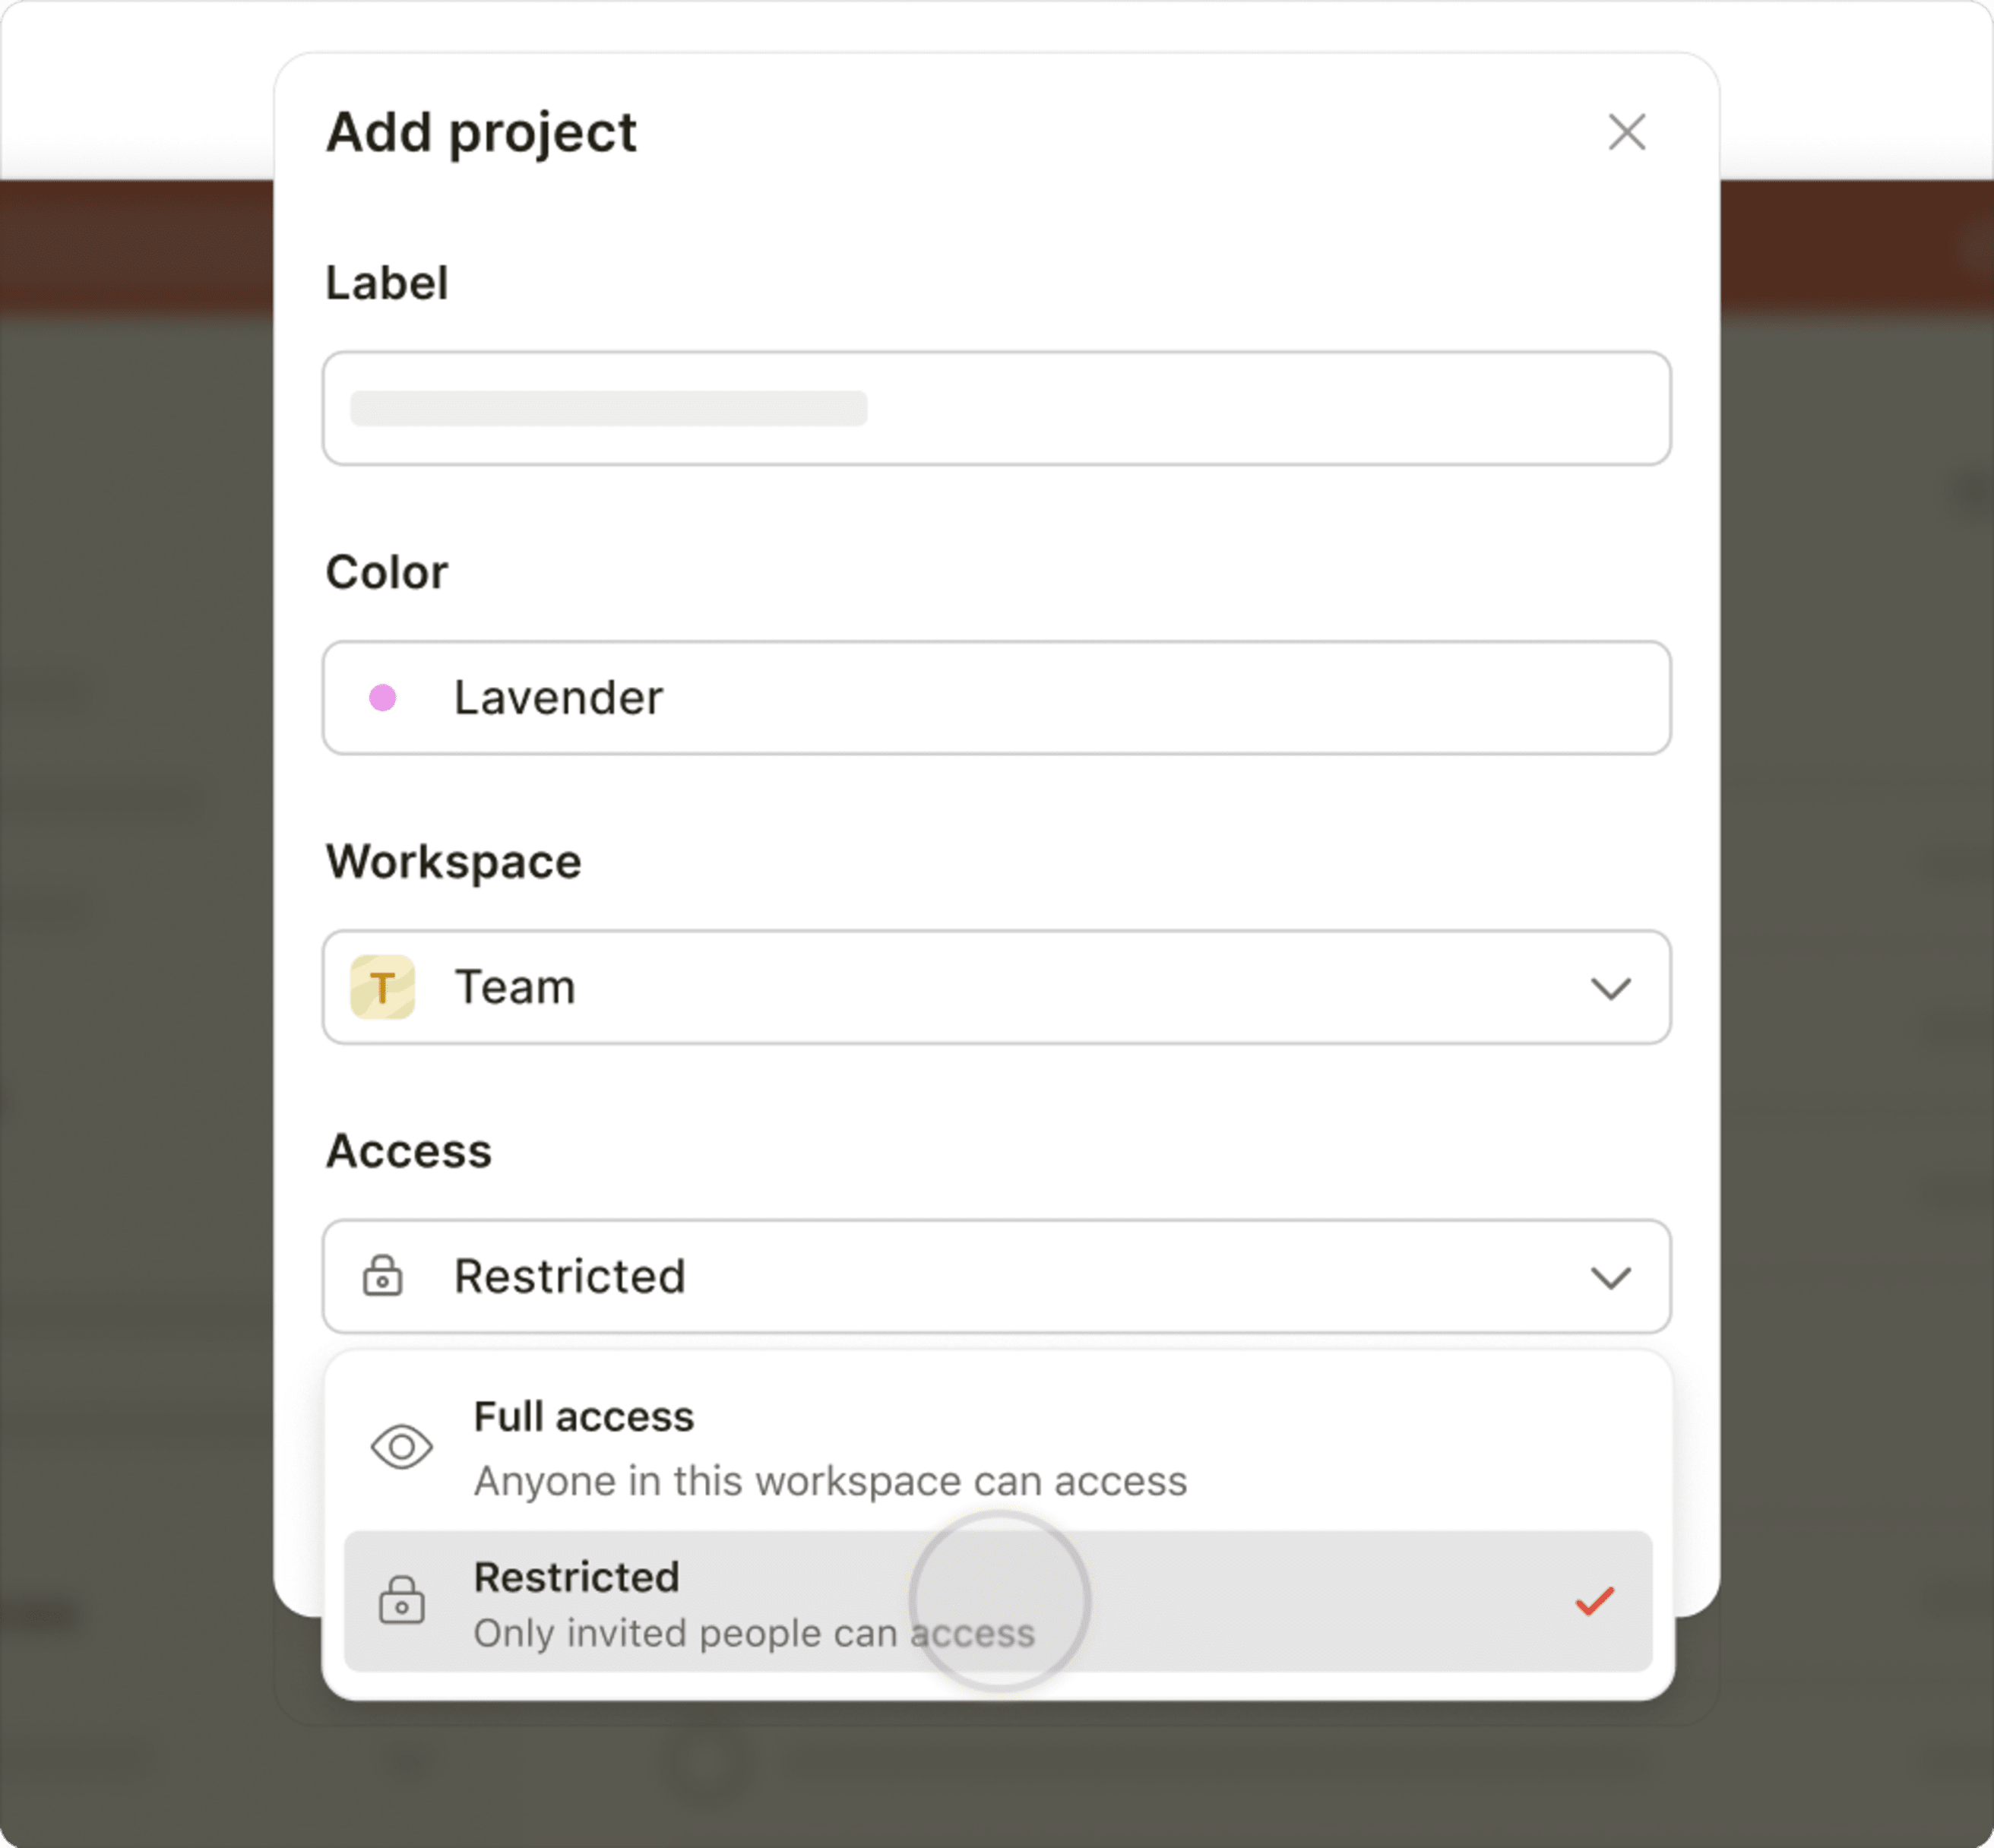
When you create or move a team project, you'll have two access options:
- Full access: All team members can view and join. Choose this option to make work easier to find and share.
- Restricted access: Only people invited to the project can access it. Choose this option for anything you want to keep more private like 1:1 meeting agendas or hiring plans.
Once you've created a team project, click the Share icon in the top-right to share it with the relevant team members. While all members can browse and preview public team projects, they’ll need to join a project before you can assign them tasks and tag them in comments.
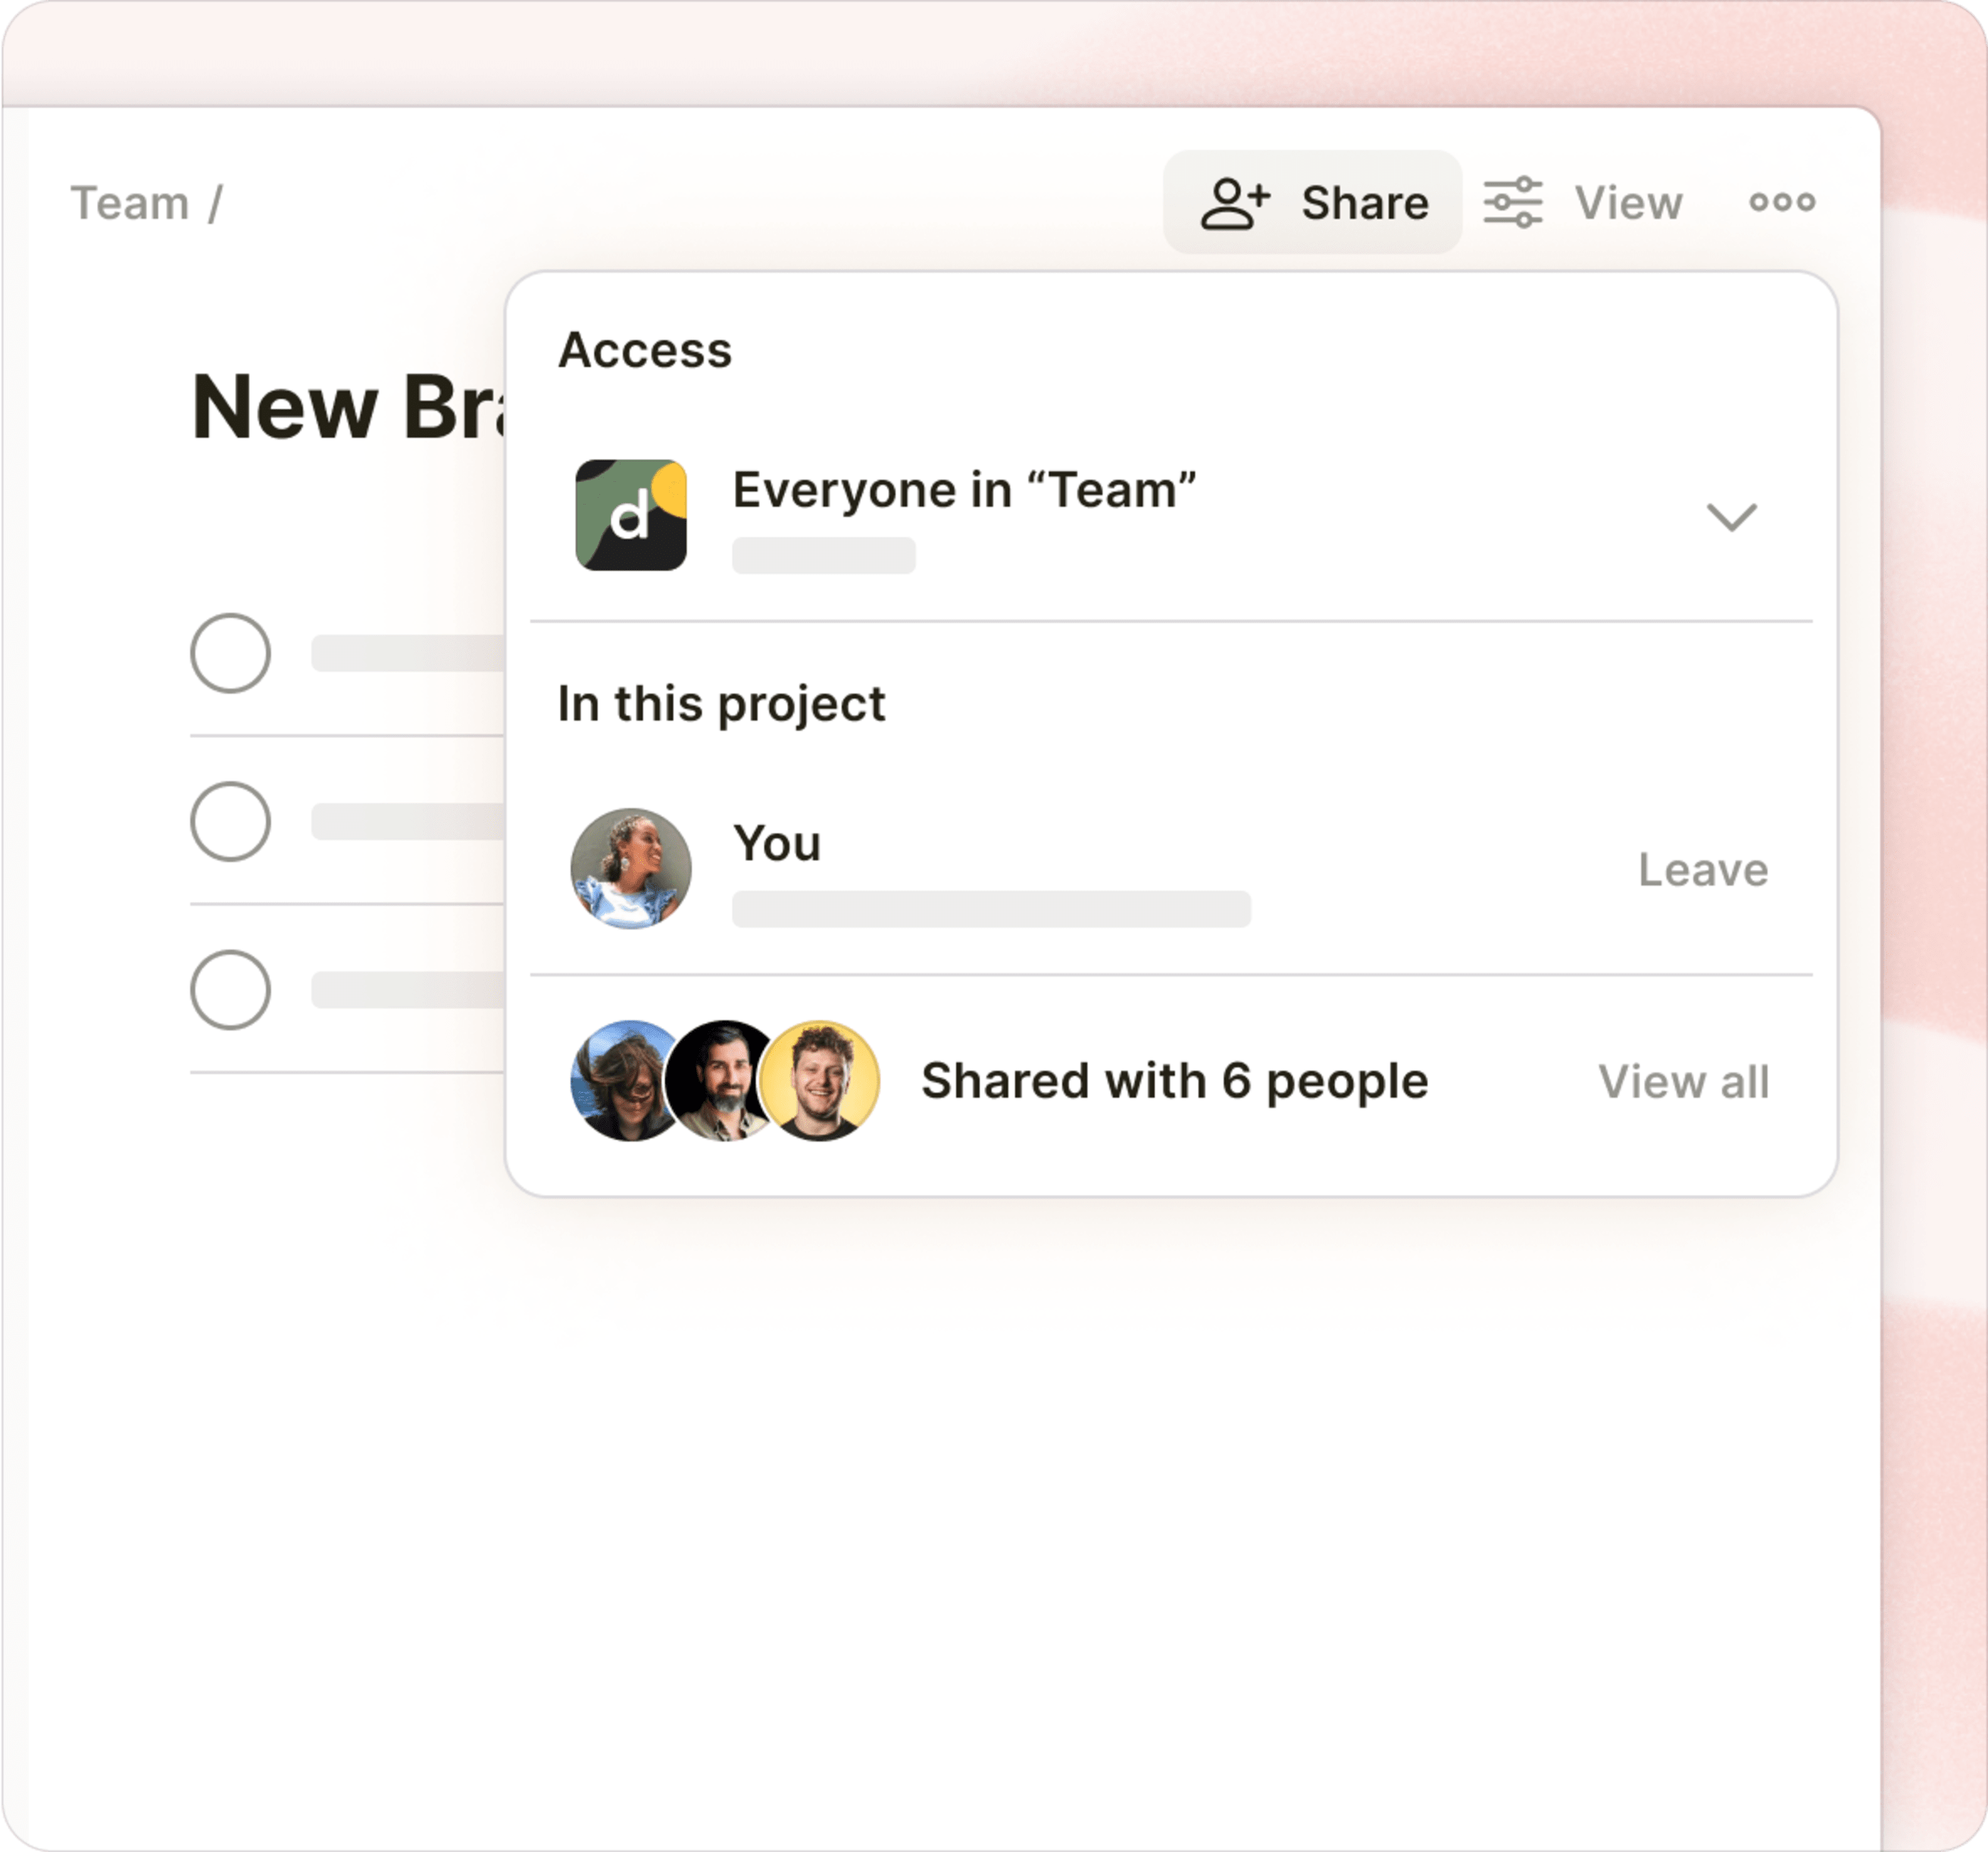
To share projects even faster, simply copy and share the project link into an email, Slack message, Twist thread, or wherever your team communicates. Team members will be able to click the link to preview and join the project on their own.

Joining an existing team
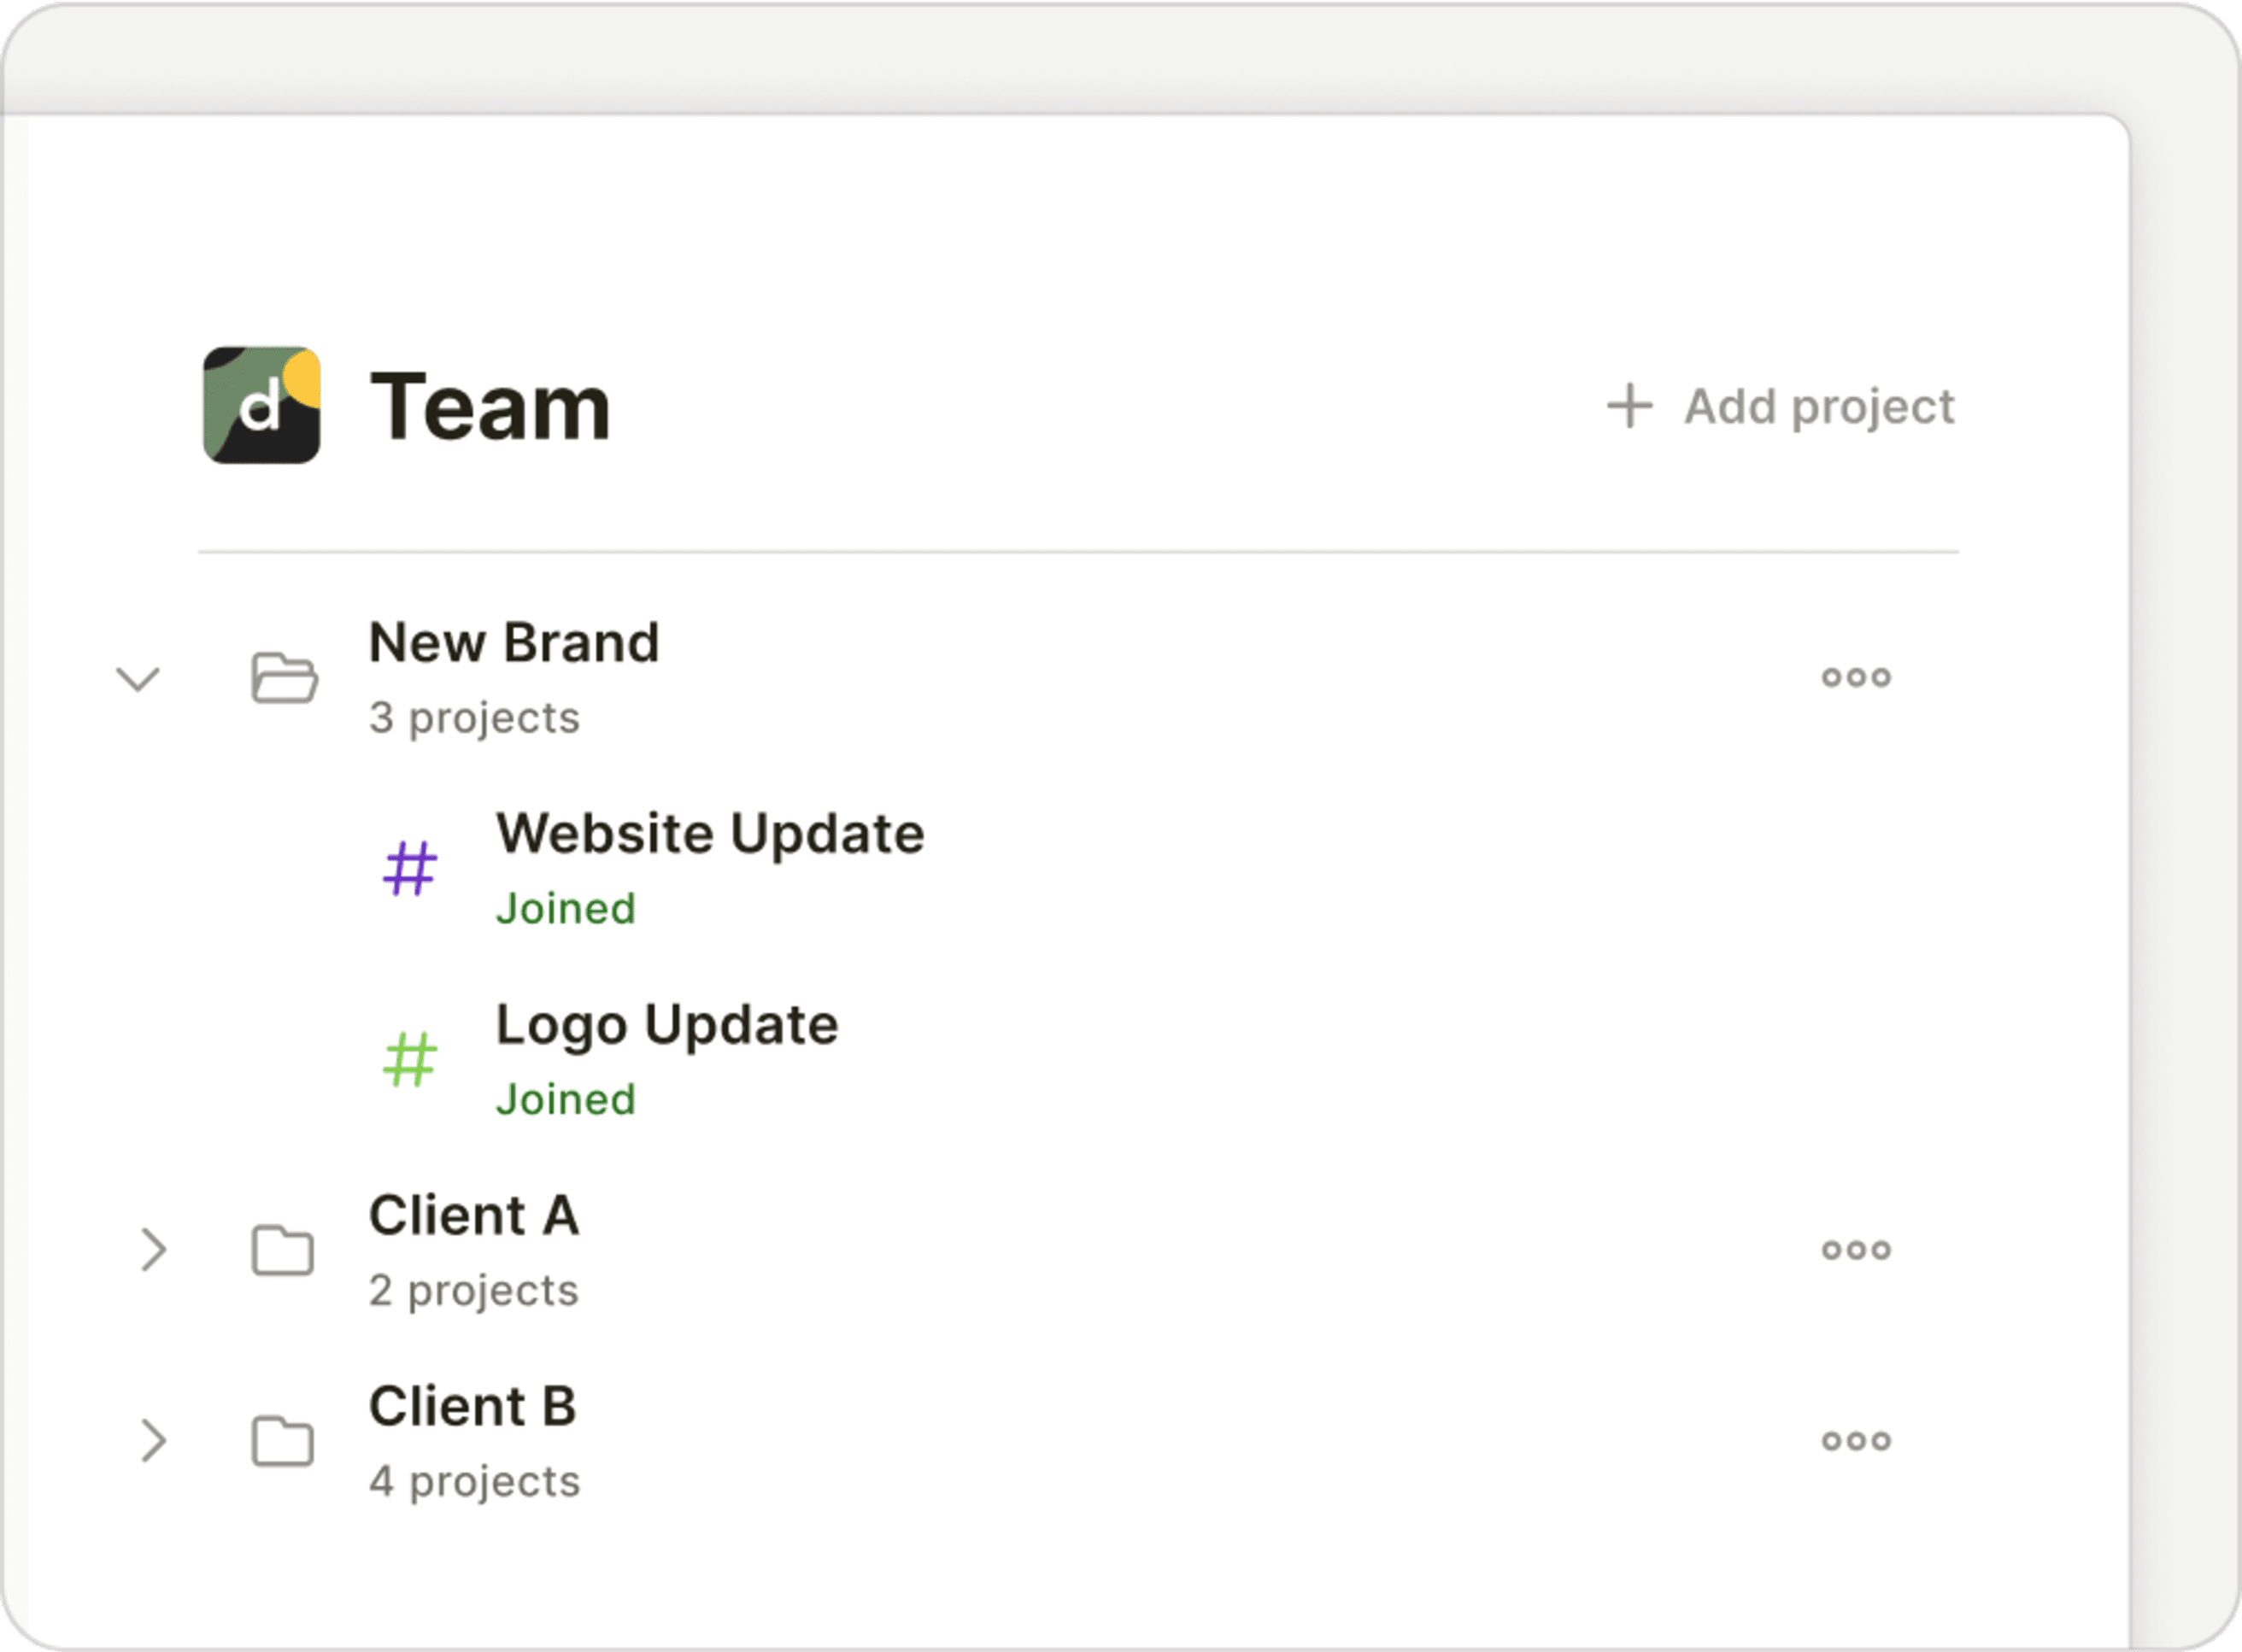
Have you successfully joined a team via email or link? Congrats! Now it’s time to join the team projects that are relevant to you.
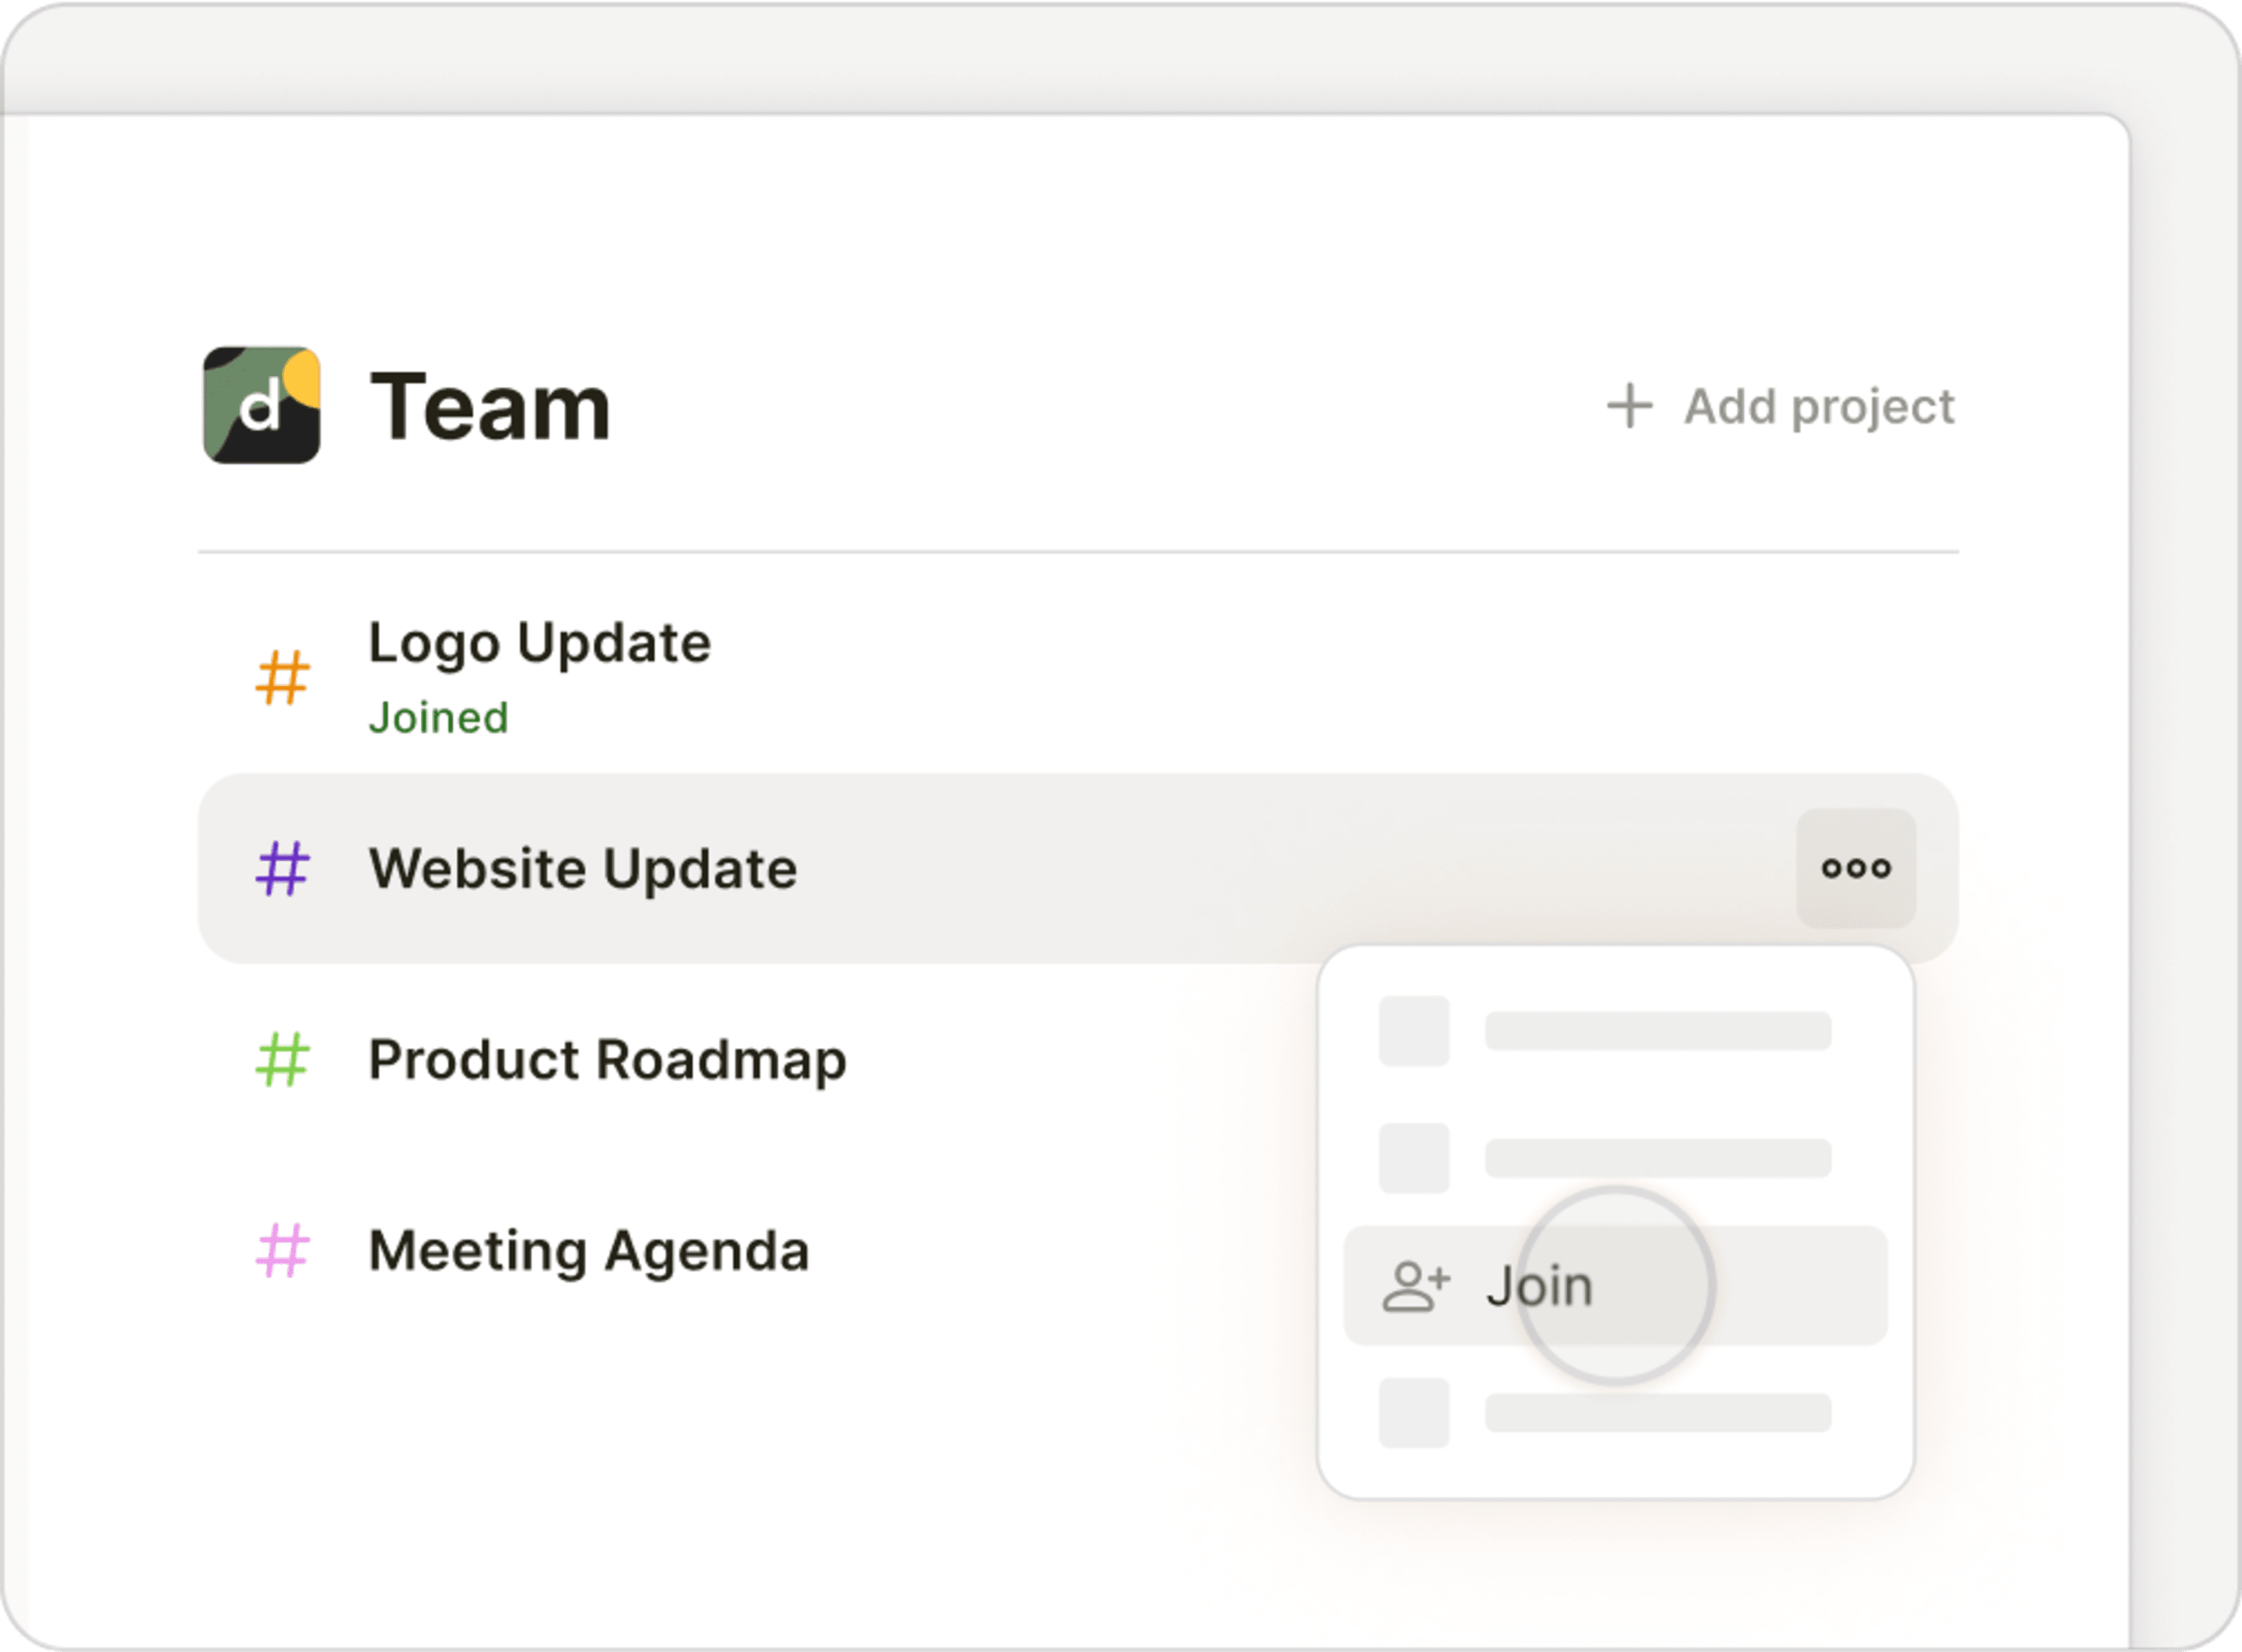
- Click the team name in the sidebar to view a list of all team projects.
- Then, click any project to preview and join it.
Projects you've joined will appear under the team name in the sidebar for easy access.
Notice new things your team needs to keep track of? As you get settled into your team’s workflow, you can start creating and sharing projects of your own.
Quick tip
Add your most important projects to Favorites, then collapse your personal and team project lists to keep your sidebar clean and focused.
Best practices for managing team tasks
You've set up your team and invited all your teammates in. Now it's time to start getting things done together. Here are a few best practices to make sure everyone's on the same page and nothing falls through the cracks...
Assign every task so everyone’s clear who’s responsible for what
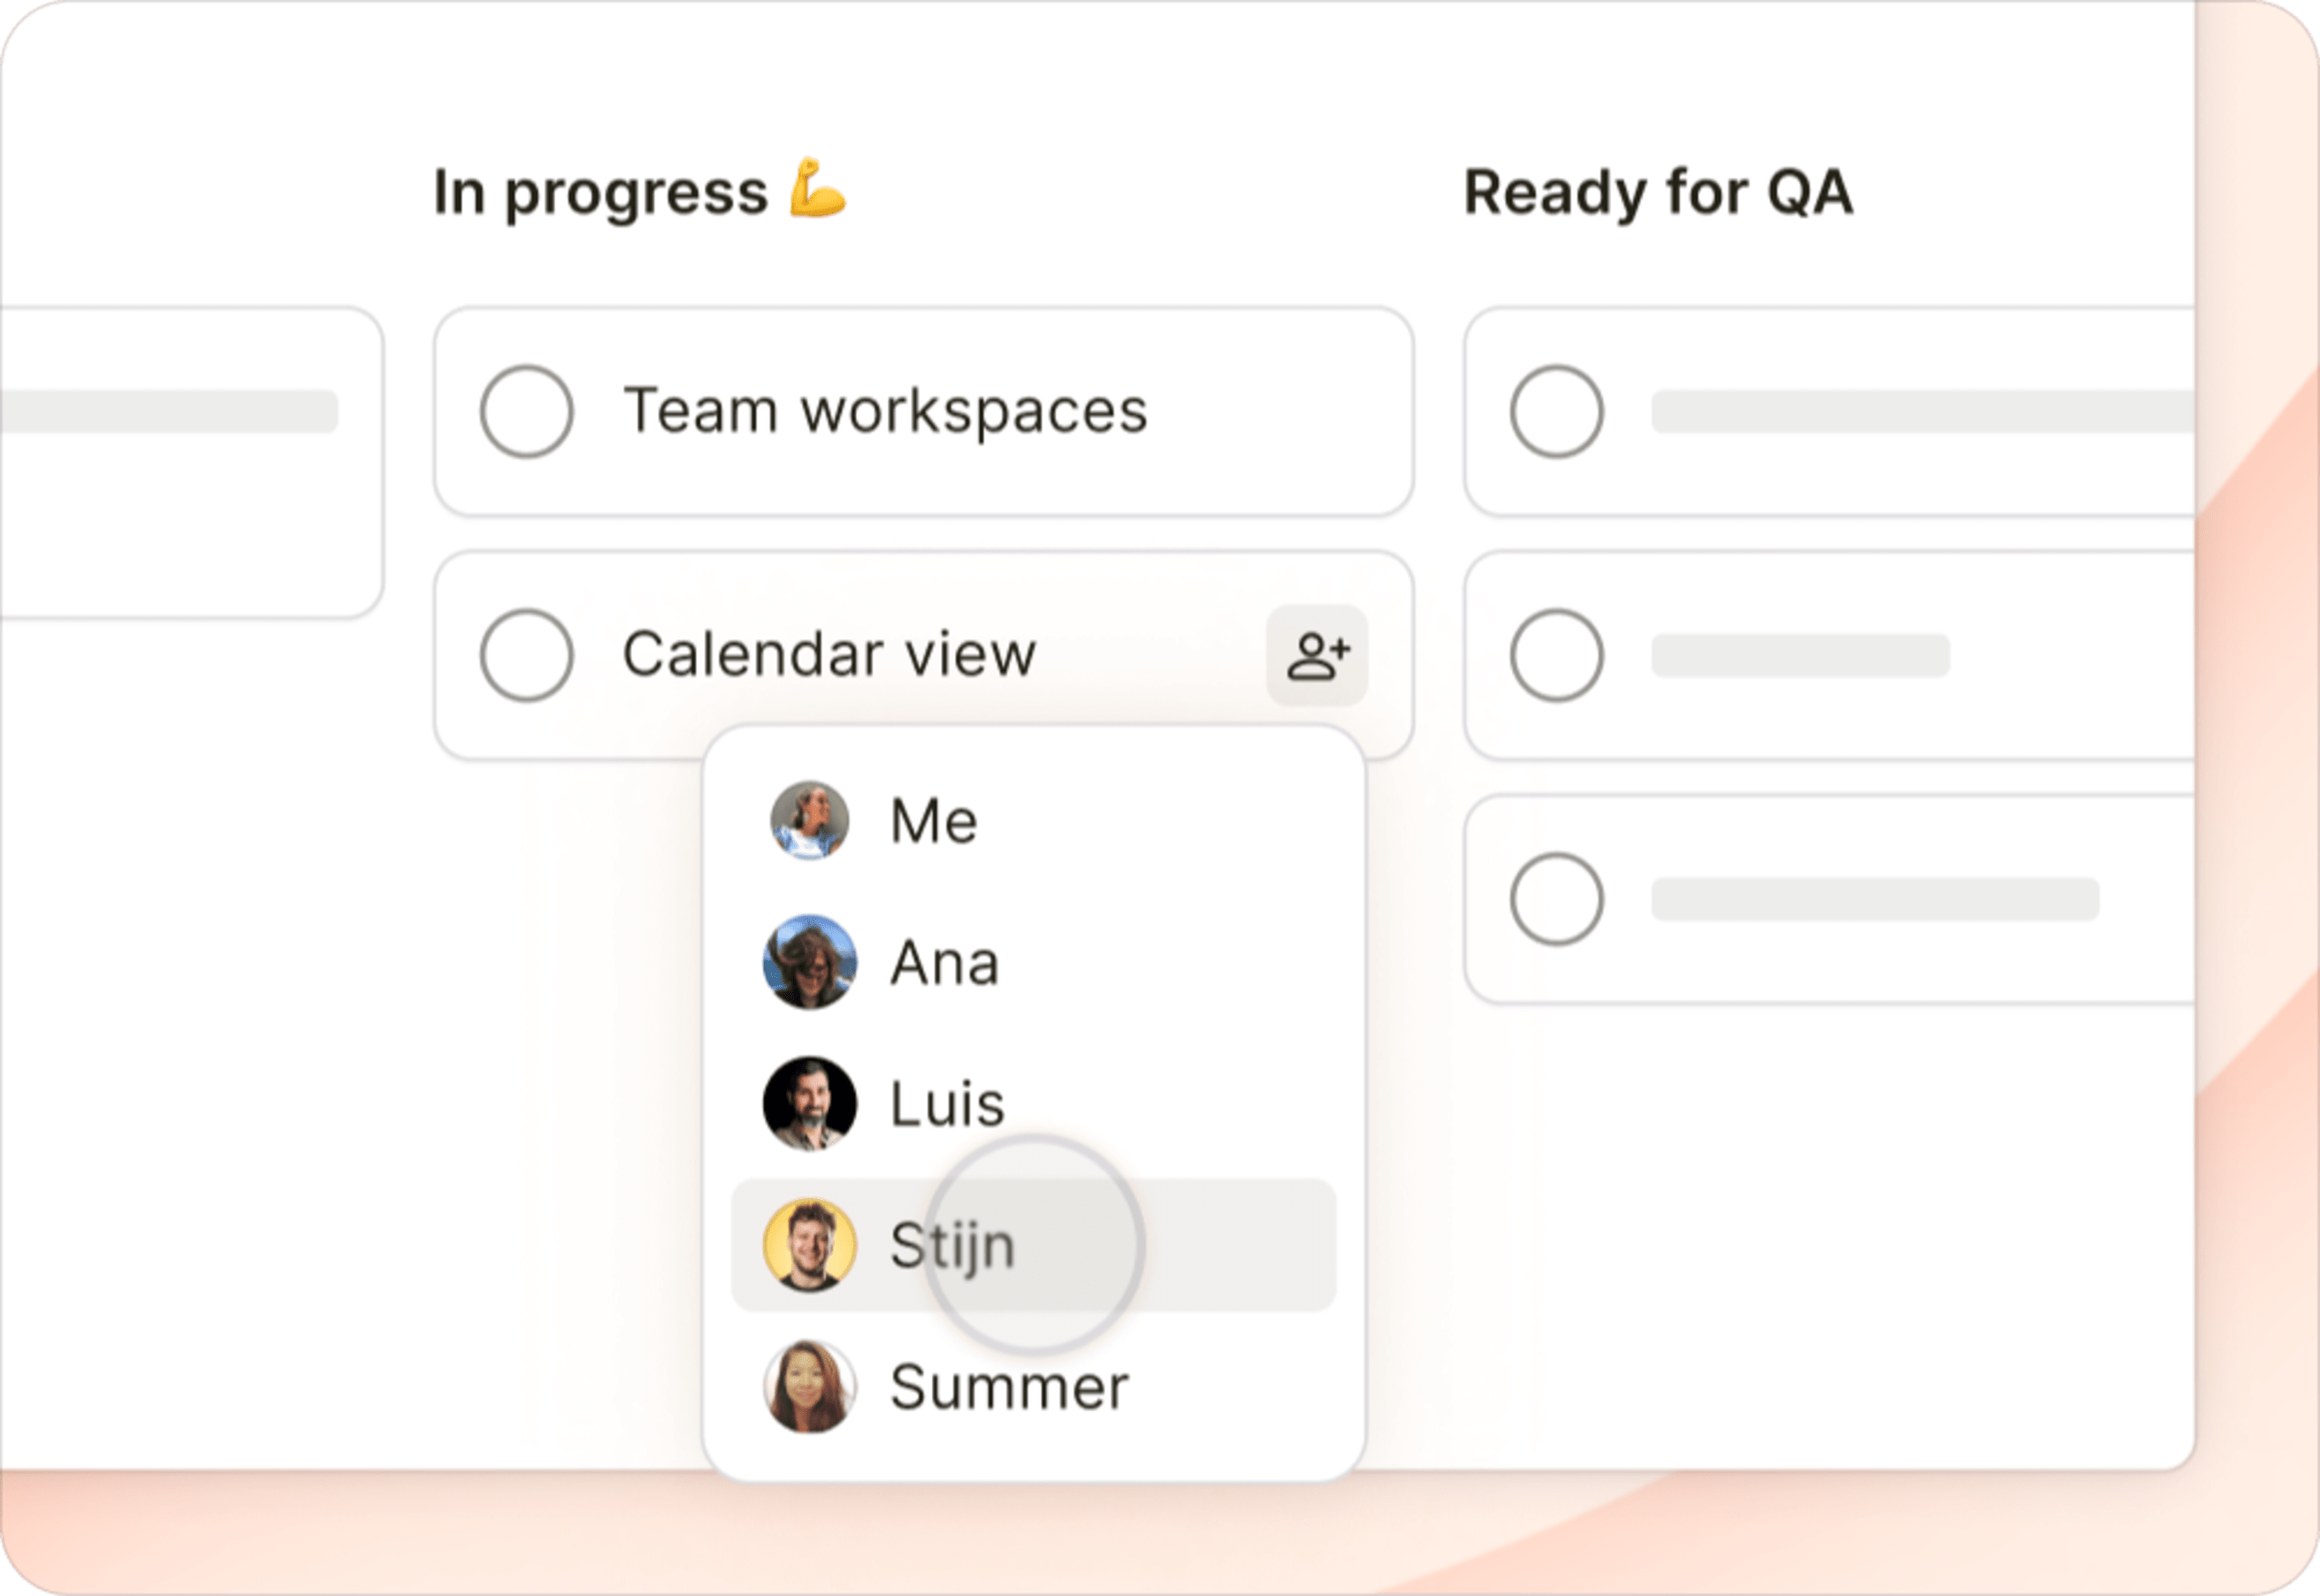
In Todoist, each task can only be assigned to one person so there’s never doubt about who’s responsible for doing what.
Want to assign the same task to multiple people? Here are a couple of options:
- When there are multiple steps to a task, create sub-tasks with their own assignees.
- When several people need to complete the same task, create duplicate tasks and assign each copy to the responsible teammate.
Set due dates – or recurring due dates – so everyone’s clear what’s due when
Simply type any due date into the task field and Todoist’s smart Quick Add will recognize it, highlight it, and add it when you save the task. Natural language due dates can be as simple as “tomorrow” or as complex as “every 3rd Thursday starting Aug 5 and ending April 10”.
See more due date examples you can use here.
Quick tip
Recurring due dates are particularly useful for things like monthly reports. Add each step as a sub-task so it's easy to zip through the checklist each month yourself – or assign that recurring admin work to a teammate. They'll know exactly what needs to be done with each step clearly listed out.
Add context in task descriptions so people have the info they need to get started
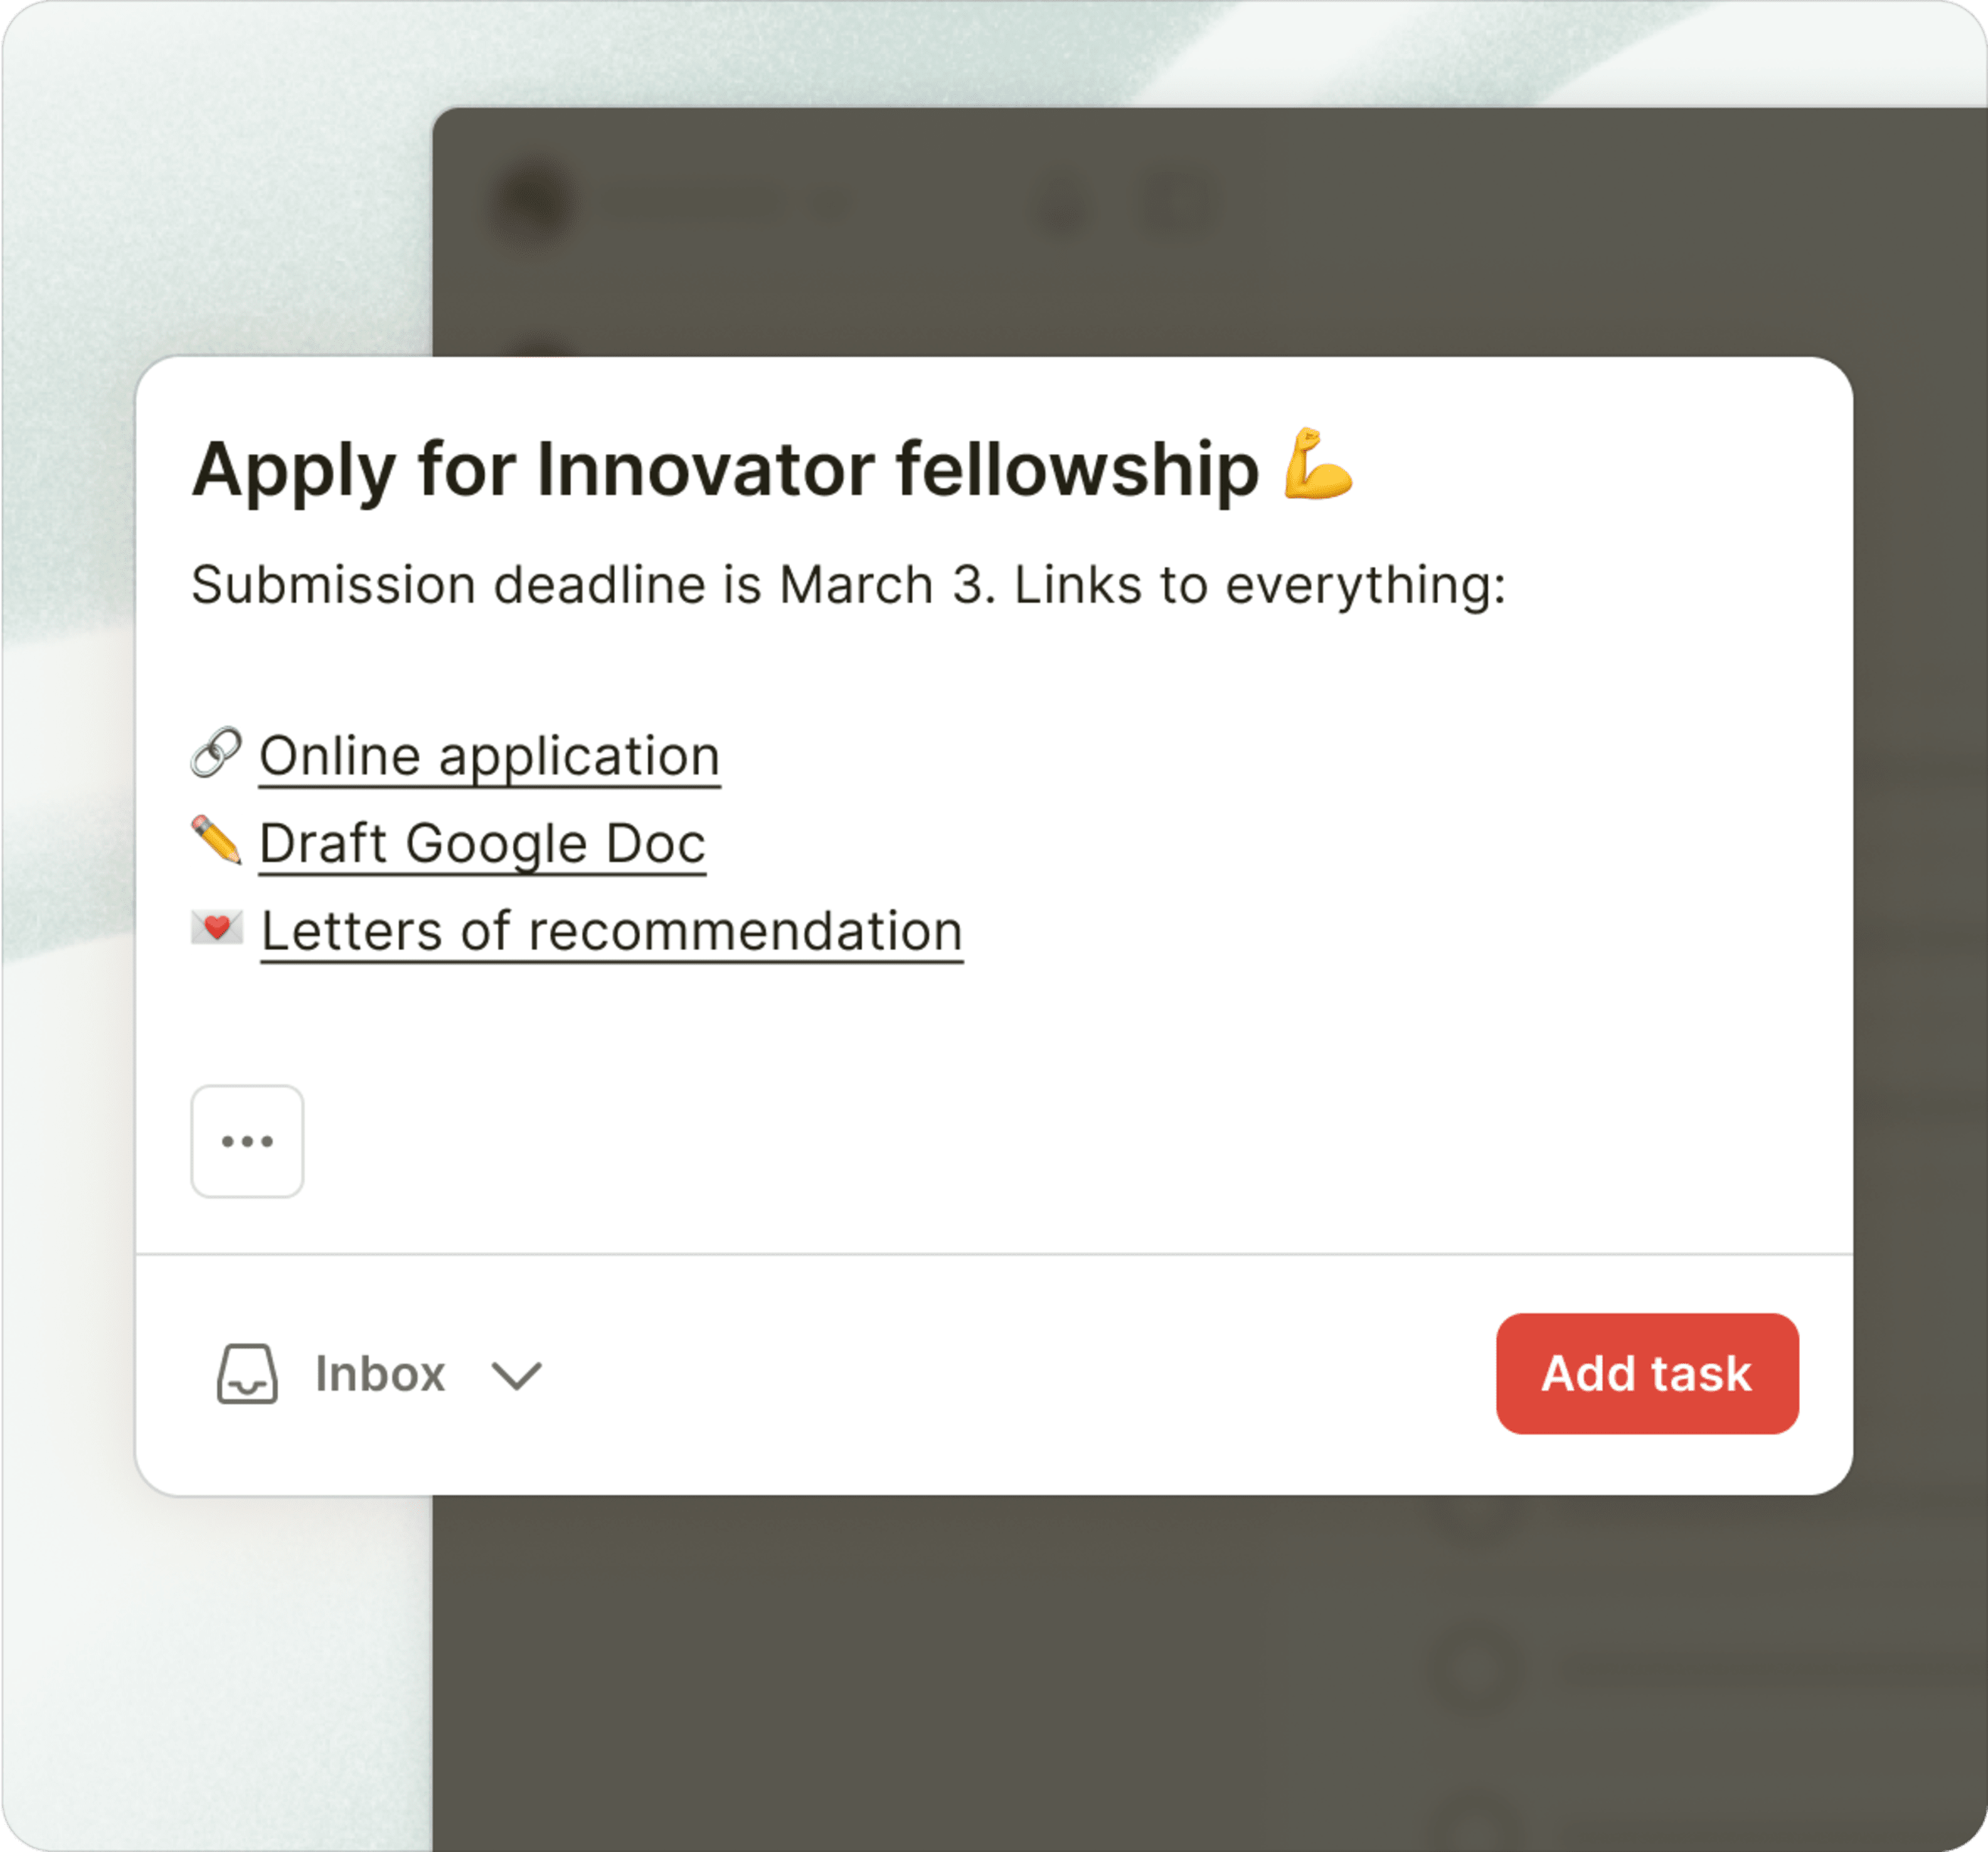
Include links to documents and as many relevant details as you can. Instead of wasting time hunting down information, your teammates will be able to just get started.
Descriptions stay organized at the top of your task view and are visible underneath the task in the project list.
Quick tip
Sometimes the “do” date (when someone will actually work on a task) isn’t the “due” date (when the task has to be done by). When that’s the case, note the final due date at the top of the task description so it’s always visible from the task list and set the task’s actual due date to when you want the task to show up in your teammate’s Today view.
Discuss details and upload files in comments
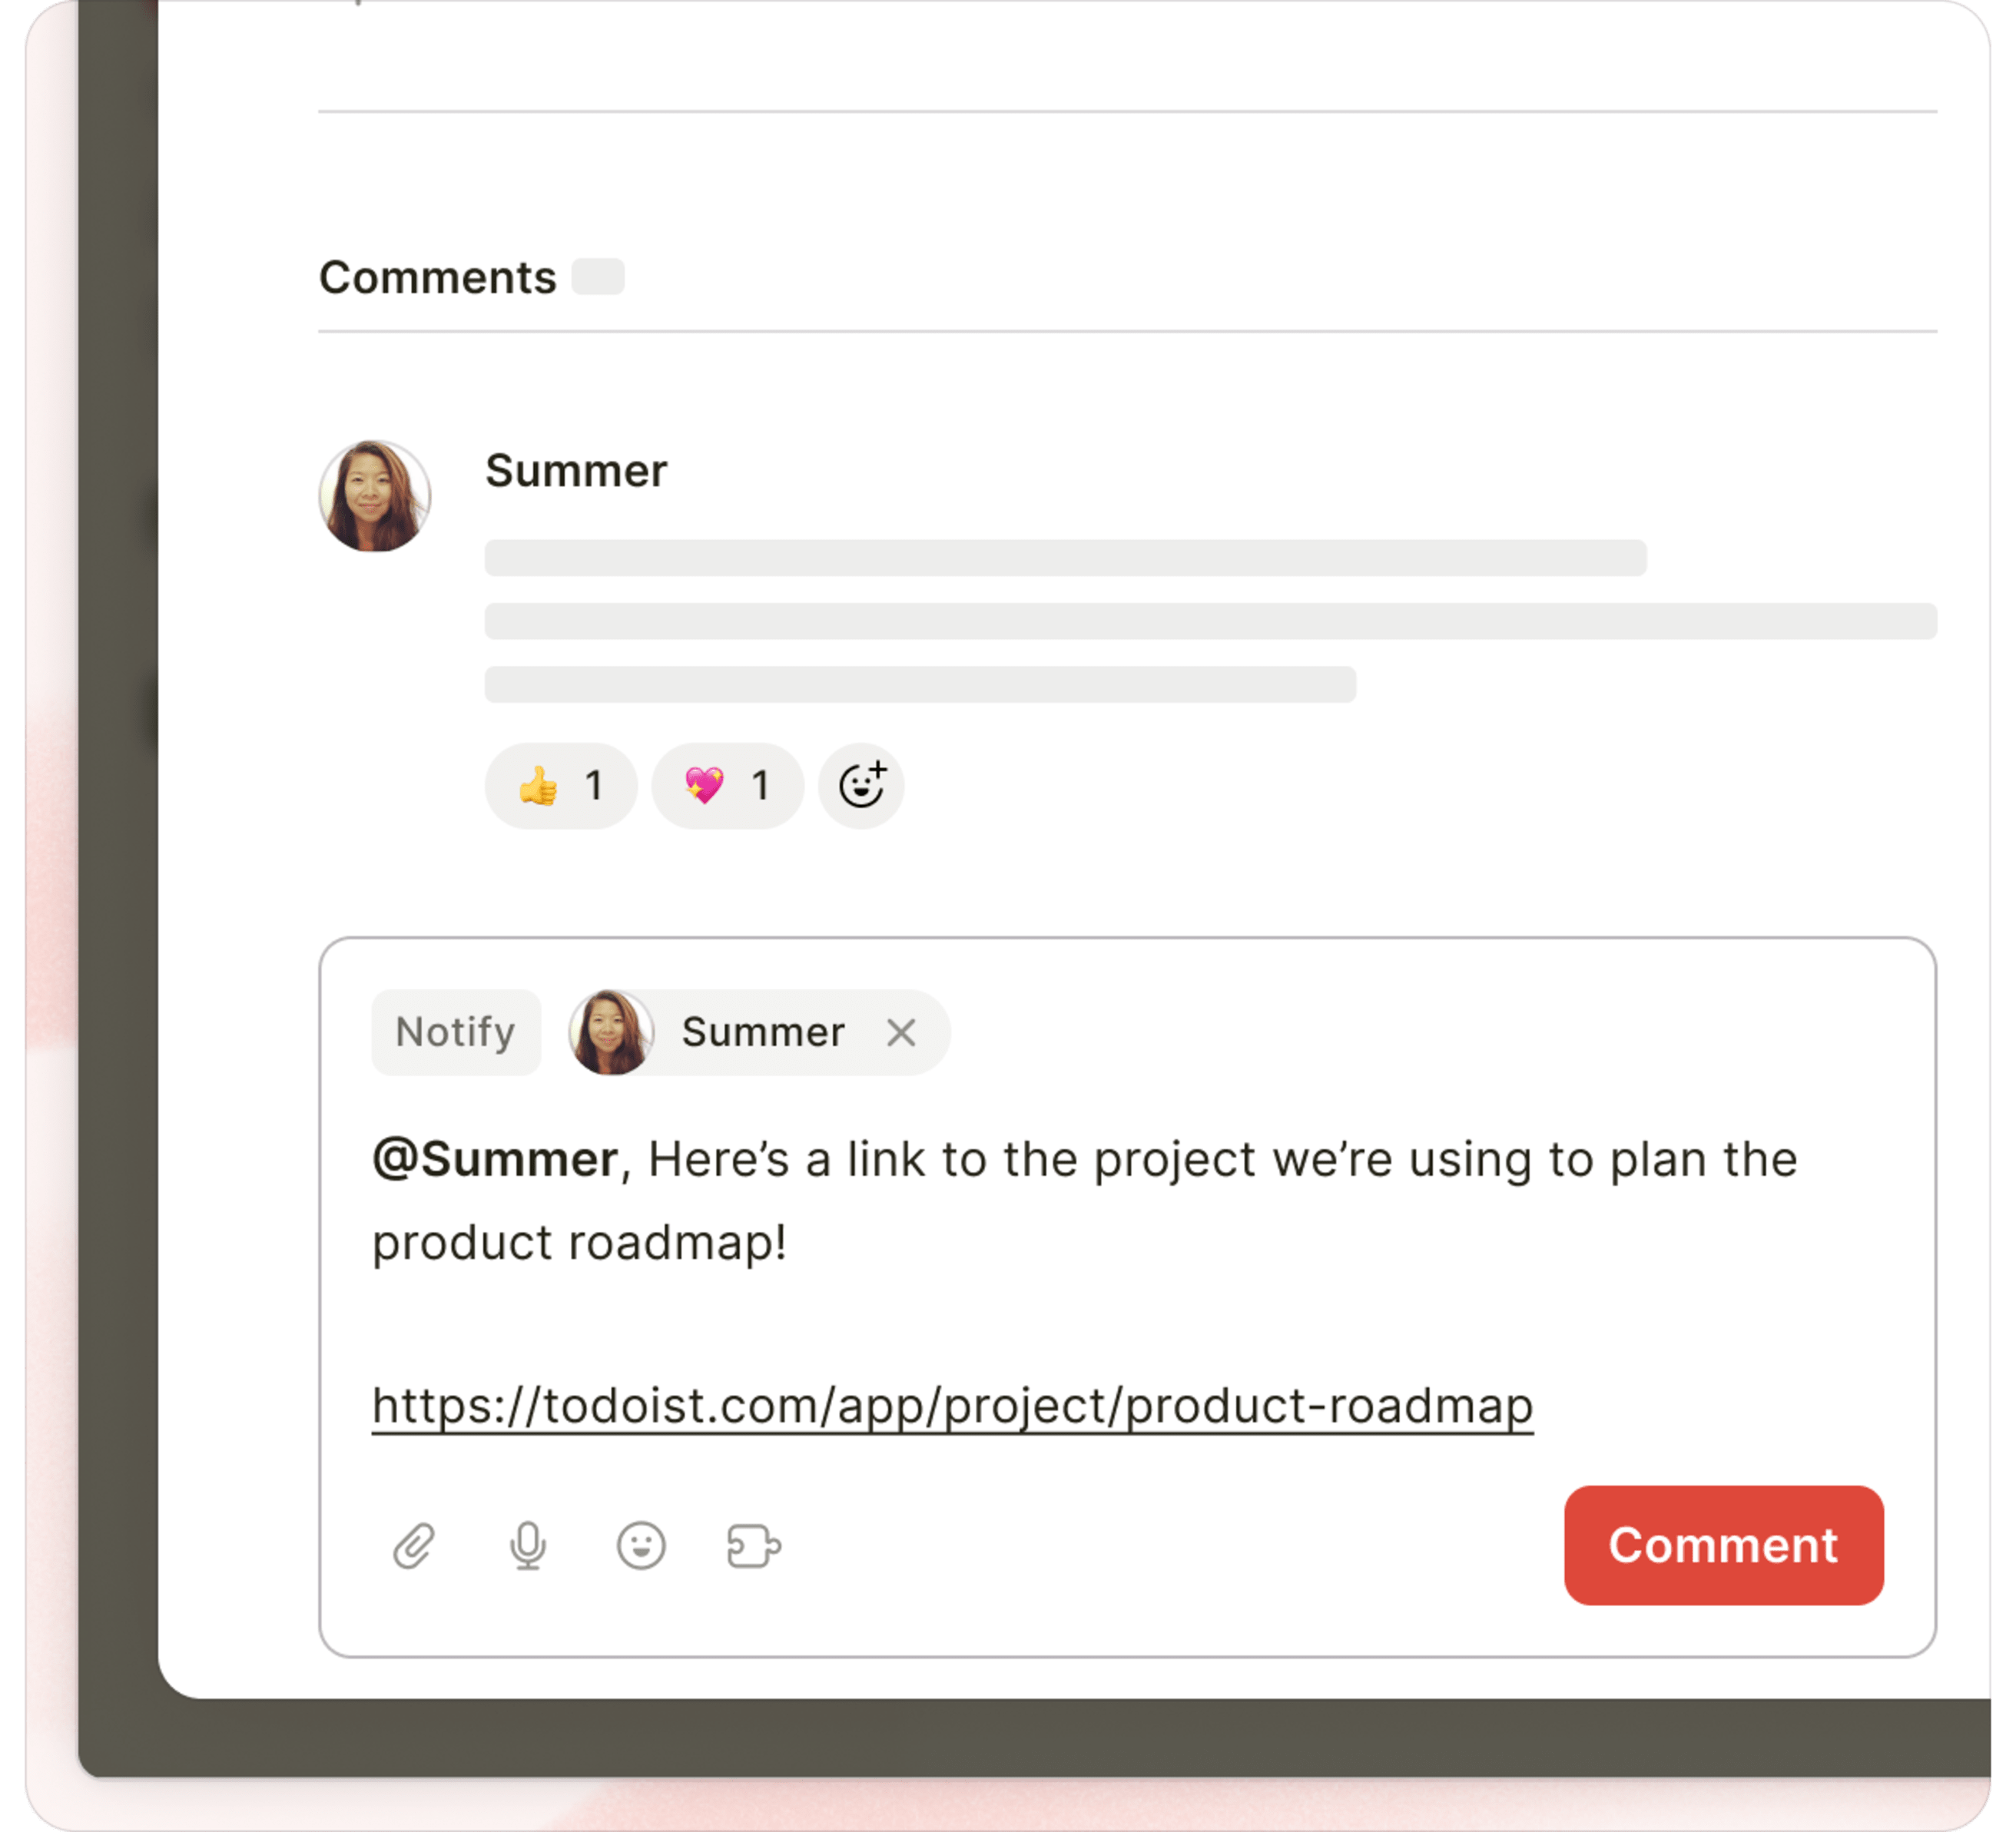
Ask questions, give more information, and provide status updates right inside your tasks. Actionable information stays in context with the task itself instead of spread across messaging apps.
Tag the right teammates to make sure they’re notified about a new comment.
Note
Task description vs comments: Use task descriptions for permanent information and resources about the task. Use comments to upload files, have back-and-forth discussions with teammates, and share status updates.
Customizing task views for better focus
Your team has ambitious plans, but it's easy to get lost and overwhelmed in all the tasks and details. Here are three ways to keep your task views focused on the right things at the right time.
Use view options to make even the biggest projects manageable
Wrangle big projects with flexible view options to rearrange, sort, and filter tasks anyway you like. Click on the View options icon in the top right of your team projects to:
- Switch between list, calendar, and board layouts depending on the needs to your project.
- Group, filter, and sort your projects by task name, assignee, due date, date added, label or priority level. For example, view just the tasks that are assigned to you inside of a larger project.
- Toggle on Completed tasks to see project progress. Or hide them to keep the project clean and focused on next actions.
Separate tasks by workspace in your Today and Upcoming views

You can access view options in your Today and Upcoming views, too. You’ll see the option to group by workspace so you can see both your personal and team tasks split up. Or filter by workspace so you can hide your personal tasks when you're at work and hide your team tasks when you're at home.
Set up custom filters for your tasks or your teammates' tasks
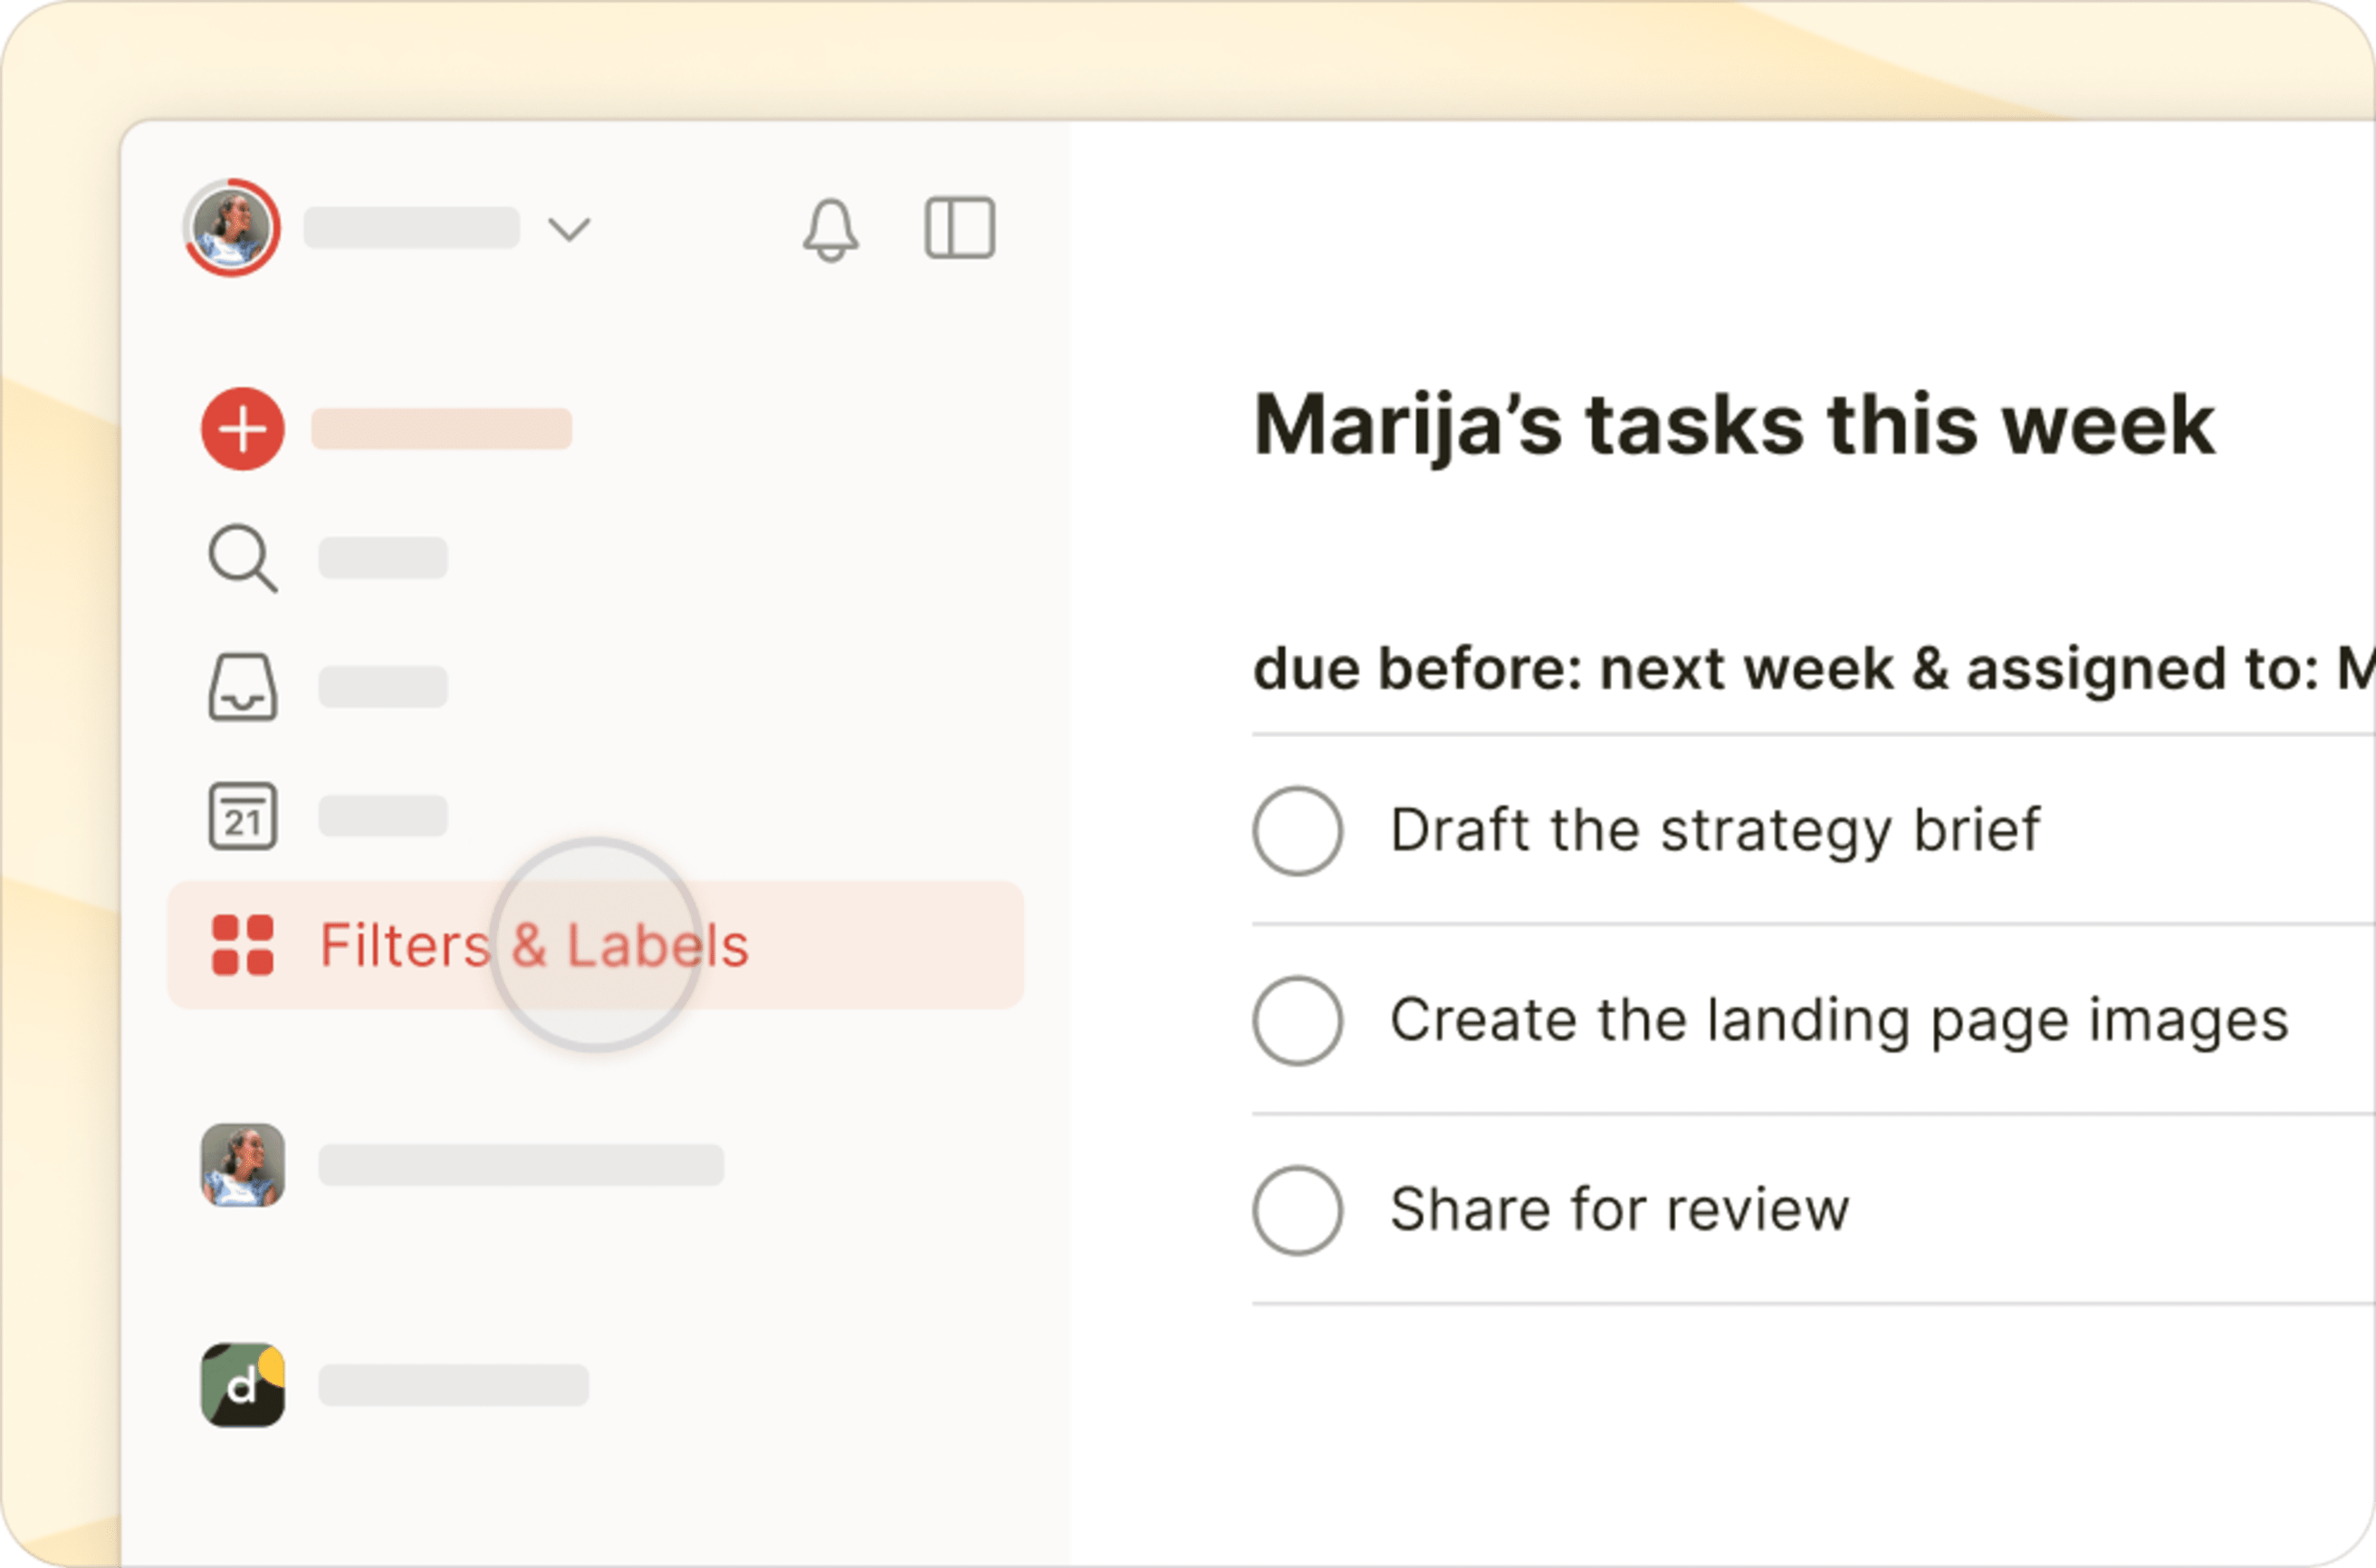
Save your own filters to focus on a subset of your own tasks – or your teammates' tasks.
For example, create a filter for all tasks assigned to "Marija" due this week, so you can see what's on her plate when you prep for your weekly 1:1.
- Use the query
workspace: team nameto only include the tasks inside team projects. - Use the query
workspace: My Projectsto only include the tasks in your personal projects.
Here are a few workspace-based filters you might find handy:
| Filter query | What it shows | Helpful for… |
Workspace: [Team name] & assigned to: me & next 7 days | All tasks assigned to you in your team workspace due this week | Planning your collaborative work for the week |
Workspace: [Team name] & assigned by: me | All tasks you’ve assigned to anyone else on your team workspace | Keeping track of progress on the things you’ve delegated |
| Workspace: [Team name] & overdue | All overdue tasks in my team workspace | Spotting blockers and adjusting plans early |
Reporting so you always know where work stands
Knowing what's been done is just as important as knowing what needs to be done next. Here are a couple of ways to stay up-to-date on everything your team is accomplishing...
Get a snapshot of your team’s work in the activity log

The activity log shows you everything you and your teammates have been up to.
Filter by person to see what individual team members have been working on. Select Everyone from the menu to get an overview of the entire team’s recent productivity.
To see an overview of completed work, select Completed tasks from the action menu.
Create customizable project reports with the Google Sheets extension
Quickly document and report on project status by exporting tasks to Google Sheets. For example, export a list of all completed tasks or all active tasks sorted by due date.
To create a report, open any project, choose Export to Google Sheets from the project menu, and select which task fields (including due date, completion status, priority, creation date, description, section, and assignee) you want to include in your spreadsheet.
What are you waiting for?
No two teams use Todoist in exactly the same way. This guide is just a starting point! Add your team and start experimenting with the workflows to make Todoist work for you.